
Whatsapp Setup
Contents
Please note that the Sailfish OS must be in the very latest version in order for all features described in this article to work. Read about updating your software here.
WhatsApp application (like most Android apps) get updates on a regular basis. We recommend installing these updates as after some time the app and Sailfish OS might become incompatible.
NOTE: The implementation of Android AppSupport varies by device. On the older devices, i.e., Jolla Phone, Jolla Tablet, Jolla C and Xperia X, Android AppSupport simulates Android version 4, whereas, in the case of the more recent products, Xperia XA2 and Xperia 10, the simulated Android version is 10 or higher. Also, the related Sailfish menu pages for Android Support have some differences between those two support categories. Bear this in mind when reading this chapter.
Downloading WhatsApp
If you have not used WhatsApp before you are reading the correct instructions here. Carry on.
However, if you have had WhatsApp on some phone previously and you would like to migrate it to a new phone then jump here.
Download from Aptoide app store
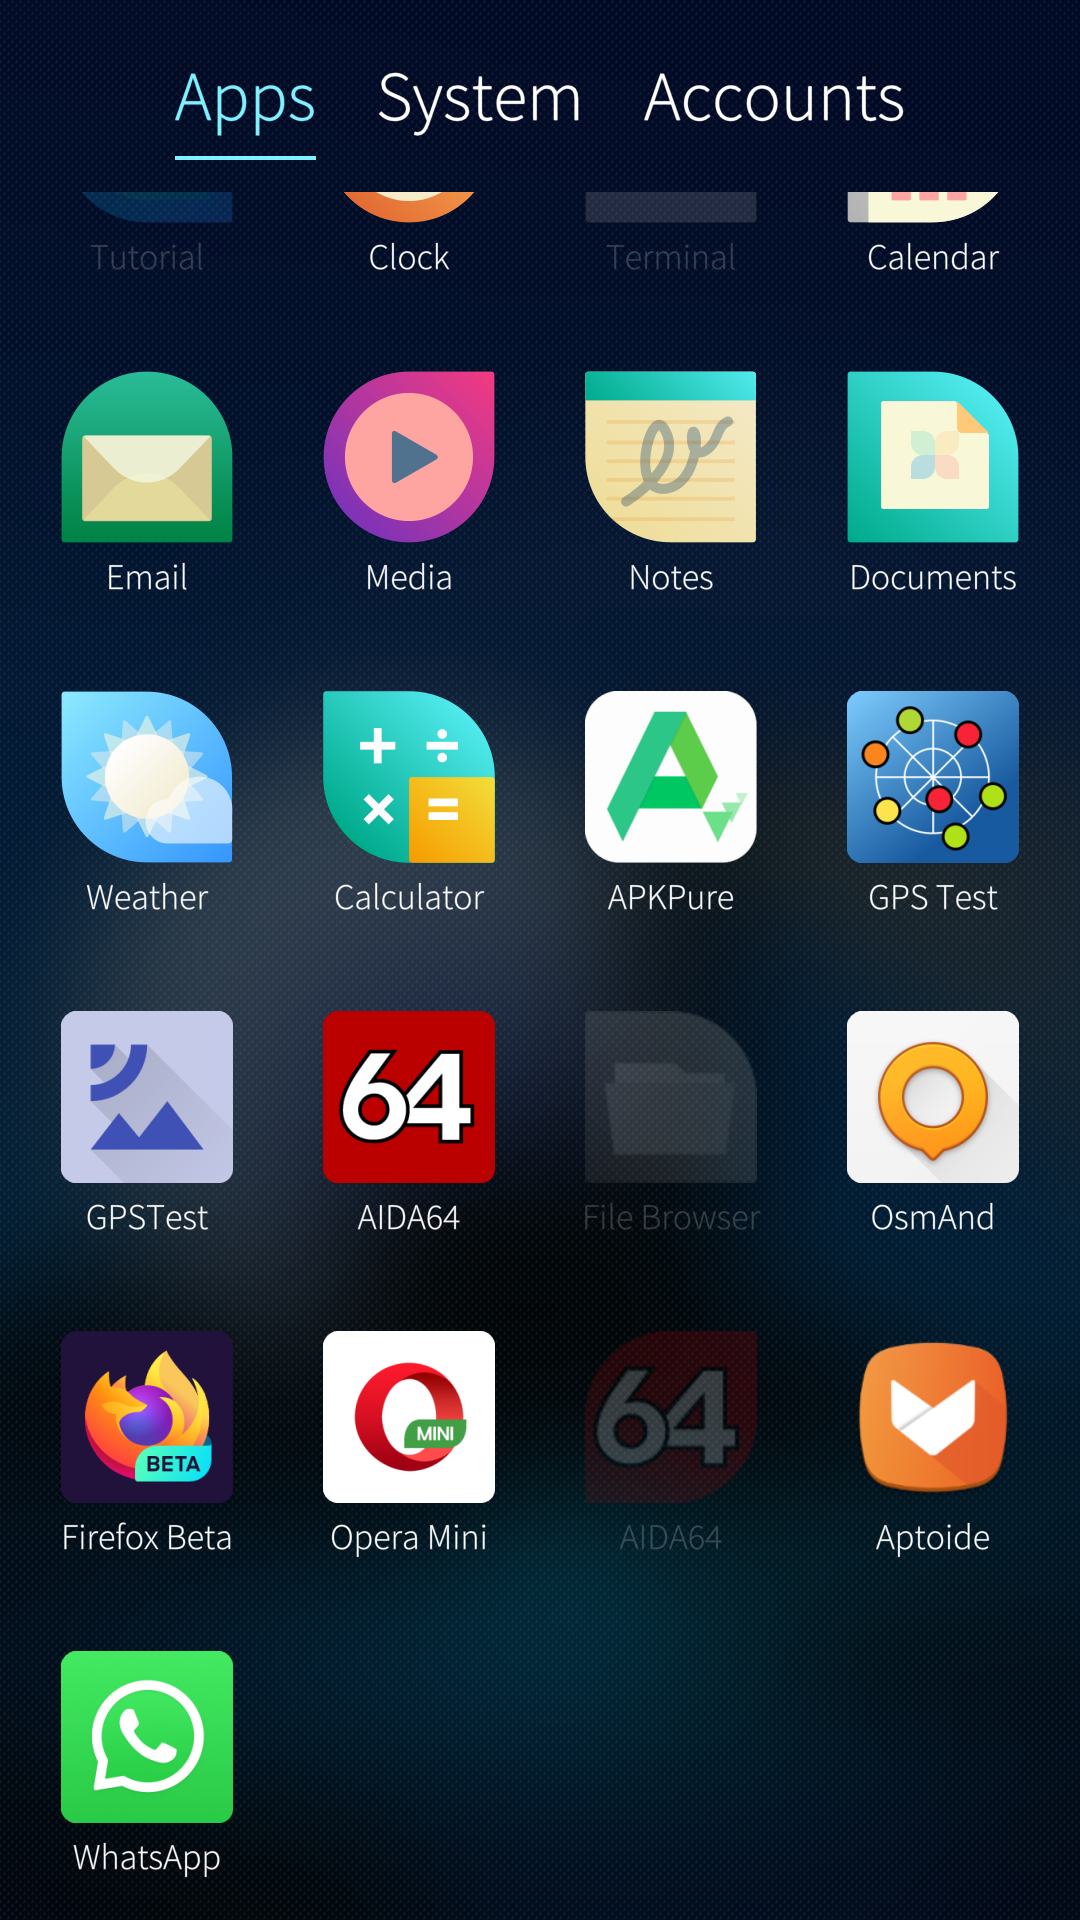
1) Open Aptoide Store on your device. Aptoide Store icon (April 2021) is shown below. This app appears by the name Store in the Sailfish application grid.
You can install Aptoide Store from the Jolla Store if you don’t already have it.
2) Open the Aptoide app. Tap the Search button at the footer of the Home view. Type “whatsapp”. In the search results, tap “WhatsApp Messenger” and install it.
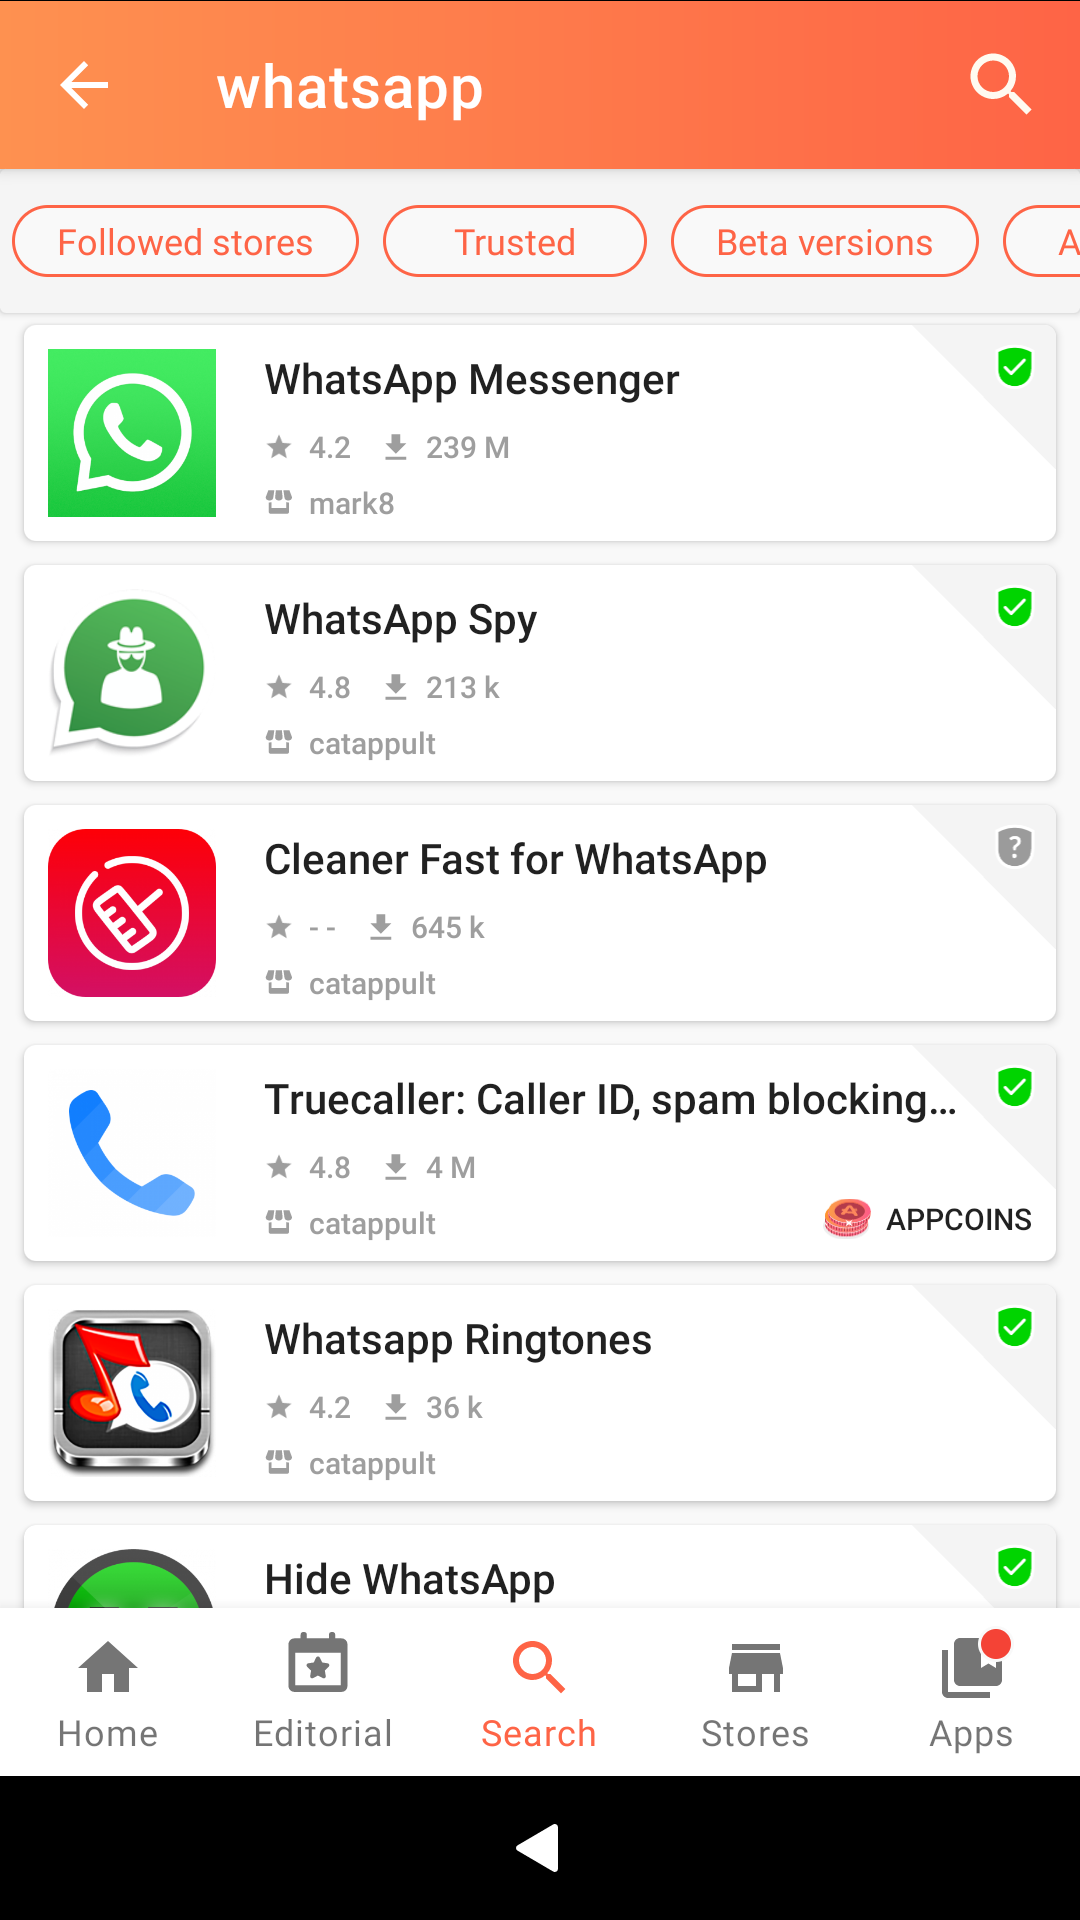
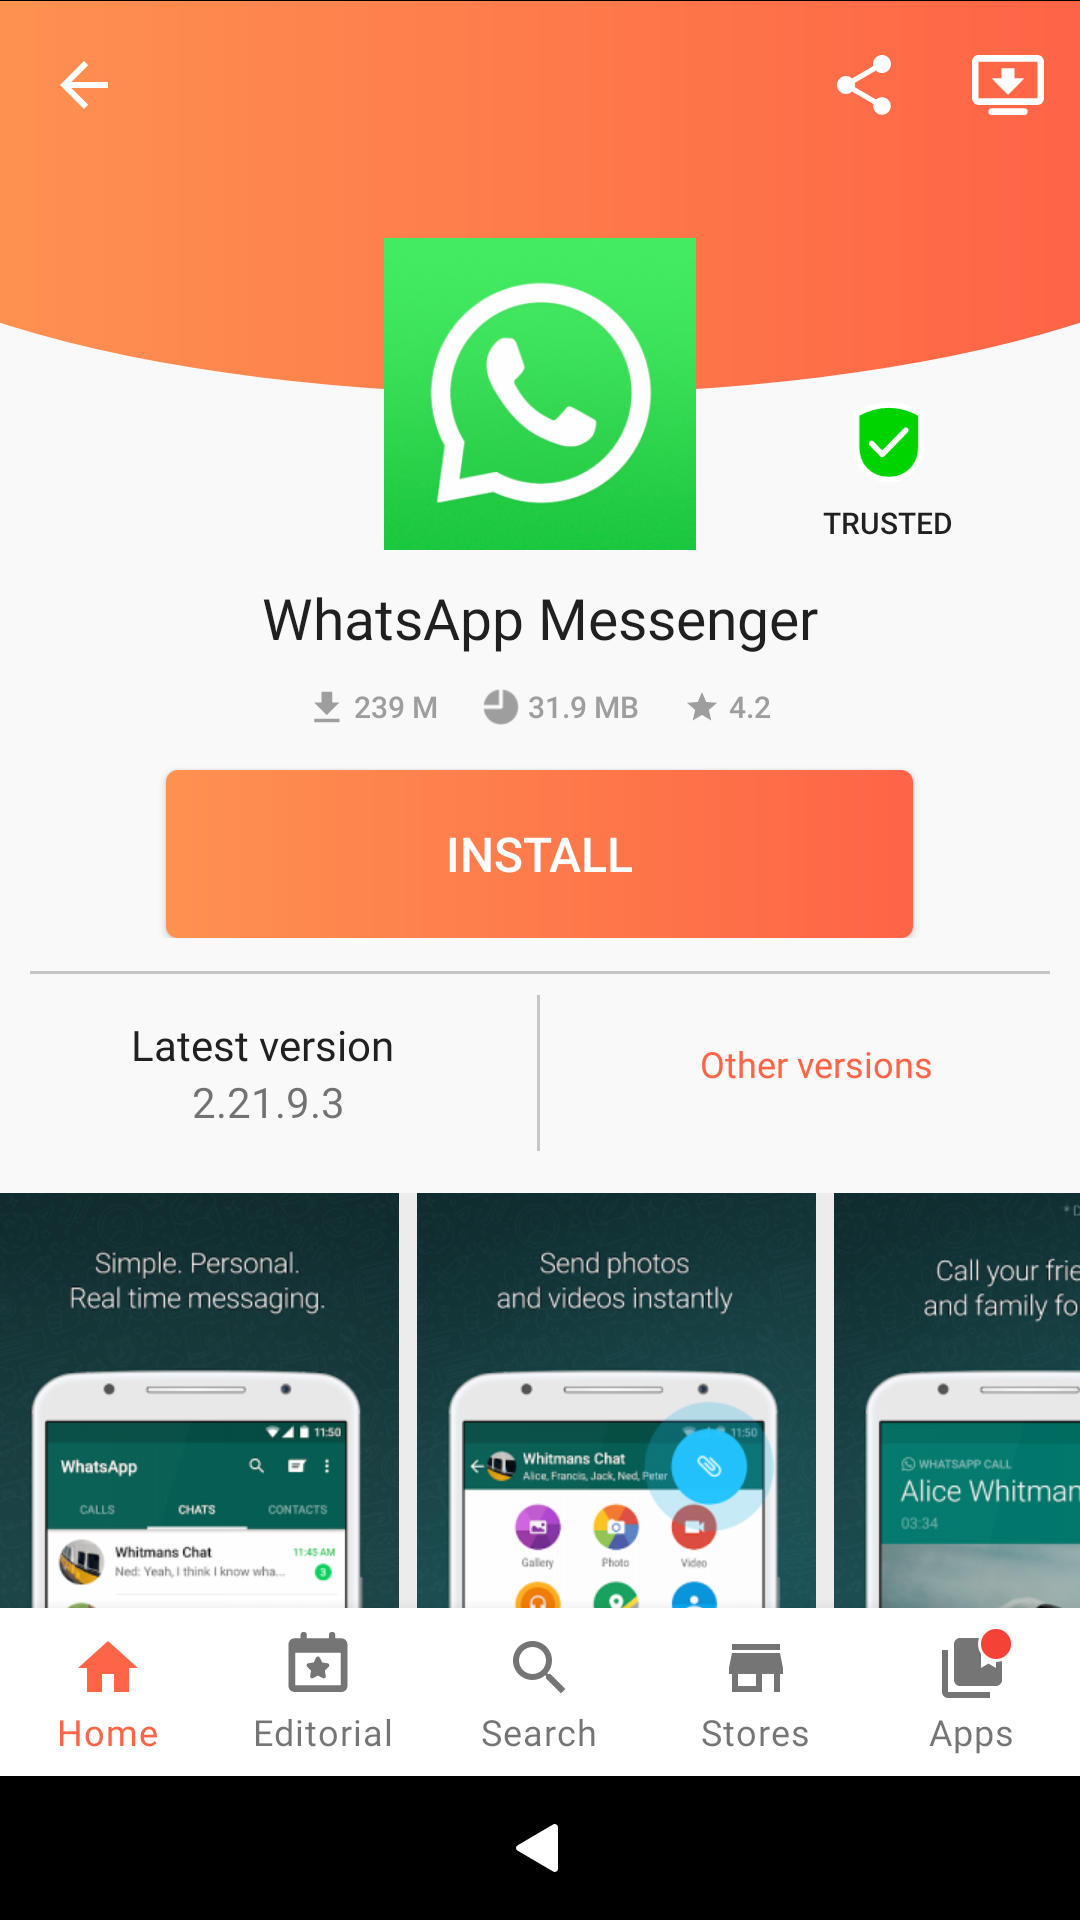 Screen captures from searching and installing whatsapp
Note that the recent Aptoide app has advertisements which it tends to show (video clips) while installing apps. Try to ignore them somehow unless they appear interesting to you.
Download directly from the WhatsApp website
- Ensure that you have enabled “Settings > System > Untrusted software > Allow untrusted software”
- Open Sailfish Browser
- Browse to https://www.whatsapp.com/android
- Tap “Package installer” (it is located to the right from the “Google Play” item) ==> whatsapp.apk is downloaded to your phone
- Open “Settings > System > Transfers” and see the apk file at the top of the list
- Install the apk by tapping it. If there is a warning about installing untrusted software, first go to “Settings > System > Untrusted software” and allow it.
After downloading and installing, you are required to activate WhatsApp before starting to use it.
Activating WhatsApp service on your device
Next, we will activate WhatsApp on your Sailfish OS device. WhatsApp uses an automated text message system for verification. We will have to help it a little by hand though, as Android AppSupport of Sailfish OS may not be able to read the necessary info from the verification message sent by WhatsApp.
Please ensure that your device has a connection to the cellular network and that Mobile Data is enabled & functioning (see Settings > Mobile network > Use SIM card). Note that although a mobile network connection (arranged with your SIM card) must be available in the registration phase, you can use WhatsApp service over a WiFi connection later on.
Open WhatsApp. Agree to the Terms and Conditions and fill in your country and phone number (without the leading zero), and press OK.
Next, you will be sent an SMS containing a 6-digit confirmation code (see the views below). Note that Sailfish OS may not detect the incoming SMS automatically but you may need to open the Messages app and check if you have received a text message from Whatsapp.
Before getting the SMS message, WhatsApp will prompt for your permission to send and view SMS messages. If you wish not to allow that then tap “Call me” and a computer will call you and tell your access code. In case 2-step verfication has been enabled for the WhatsApp account, then after entering the code from the SMS/call the two-step verification dialogue will appear. It requires typing of the 6-digit code.
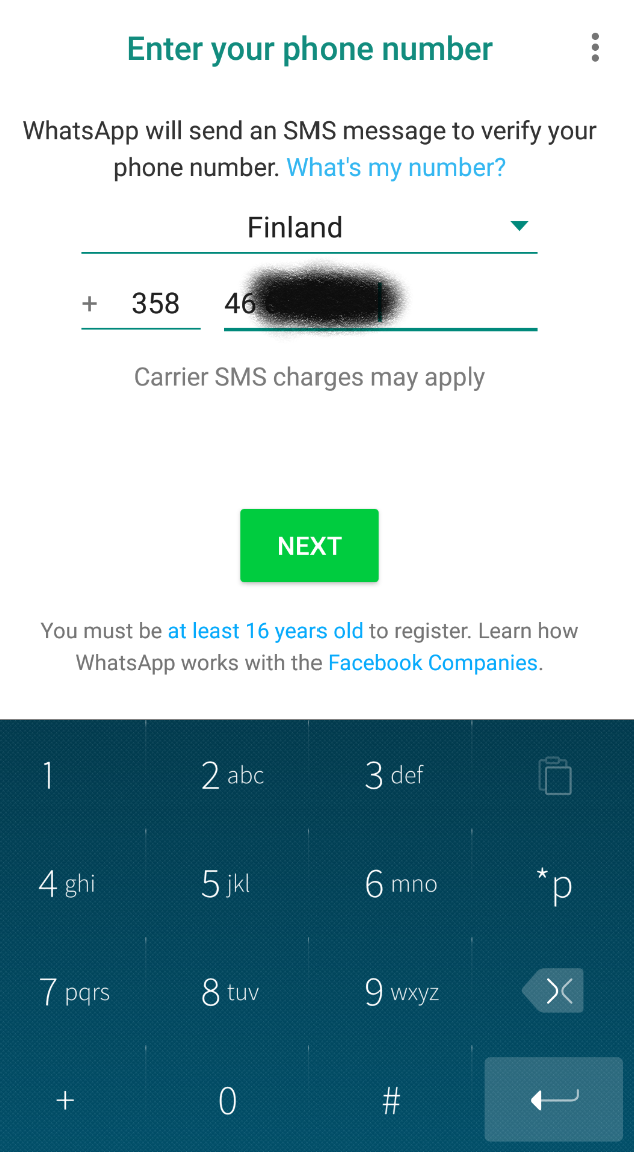
 Screen captures from setting up the whatsapp
Making sure WhatsApp gives notifications even when not open
By default, notifications will not come through unless you have WhatsApp fully open or, at least, minimized to the Home screen.
Should you wish to be alerted of WhatsApp messages and calls whenever they might arrive, regardless the application is running, please do the following:
1) In Settings > Android AppSupport, enable the option “Start Android AppSupport on bootup”. This keeps the Android system operational and ready for use.
2) Go to Settings > Apps
3) Find WhatsApp from the grid of application icons:
4) Then, enable the option “Allow application background services to start on bootup”. This makes Whatsapp’s background processes start as soon as the device starts up:
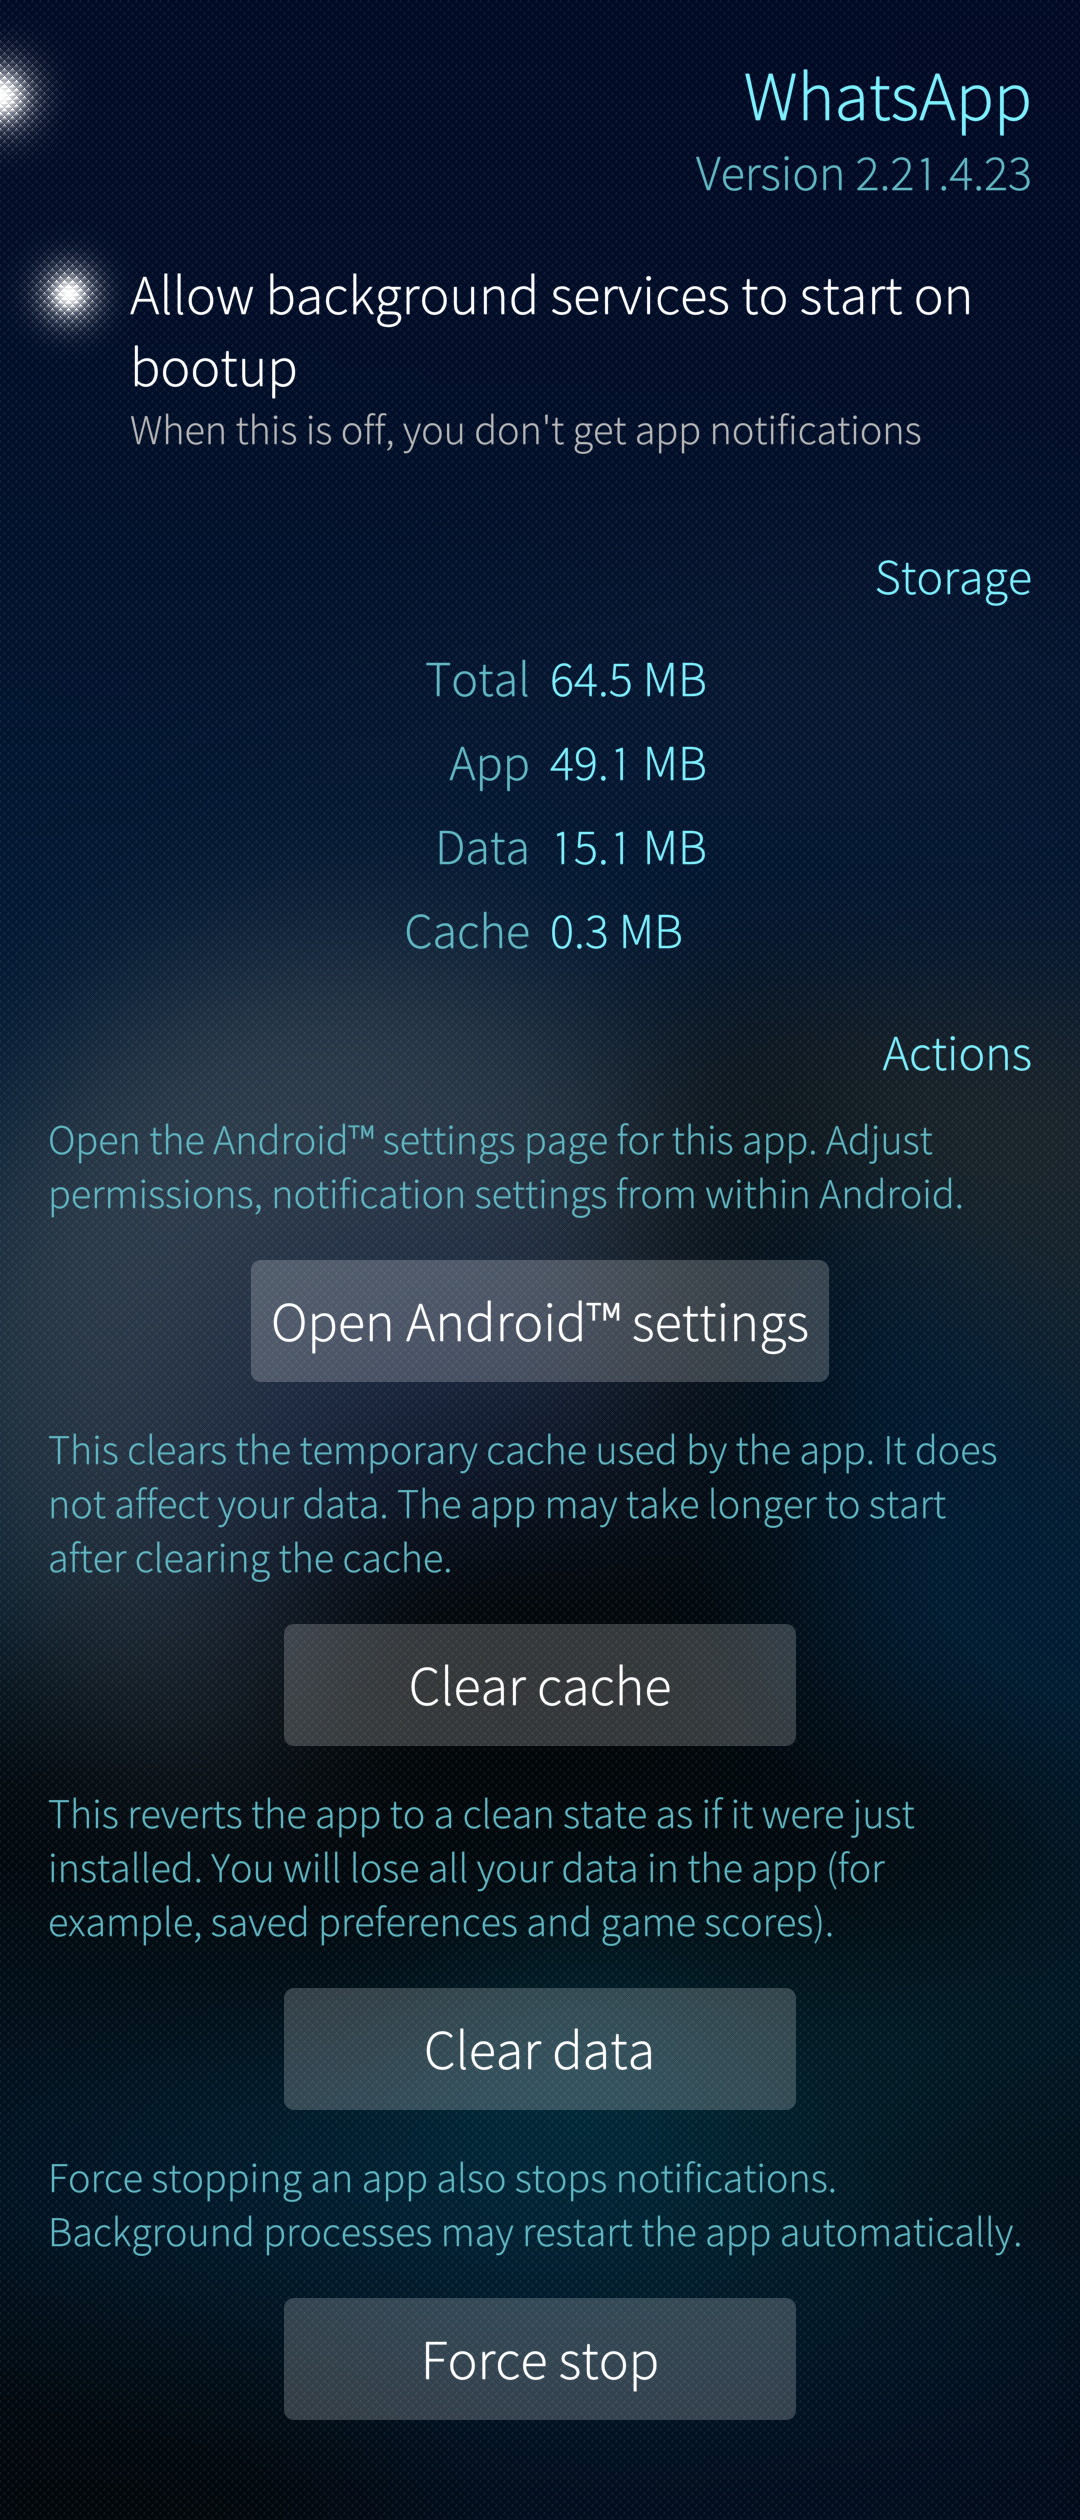
The switch in this view will make WhatsApp’s background processes run all the time on your Sailfish device, regardless of WhatsApp is open or not. While this means that you will be receiving messages whenever they arrive, it may also have an impact on battery life, making it shorter, unfortunately.
You may need to restart WhatsApp for this change to be applied.
Please also note the other controls for the Whatsapp application in the view above.
5) The button “Open Android settings” (see the picture above) exists on Android AppSupport version 8.1 and later only, i.e. on Xperia XA2 and Xperia 10 devices.
If you have a different device, go to step 6.
The settings button makes it possible to tune app the Android-specific settings of this app after it has been installed. For instance, consider allowing it to present notifications and permit you to use some resources of your phone (if not all - see the picture below right).

 Screen captures from setting up the whatsapp
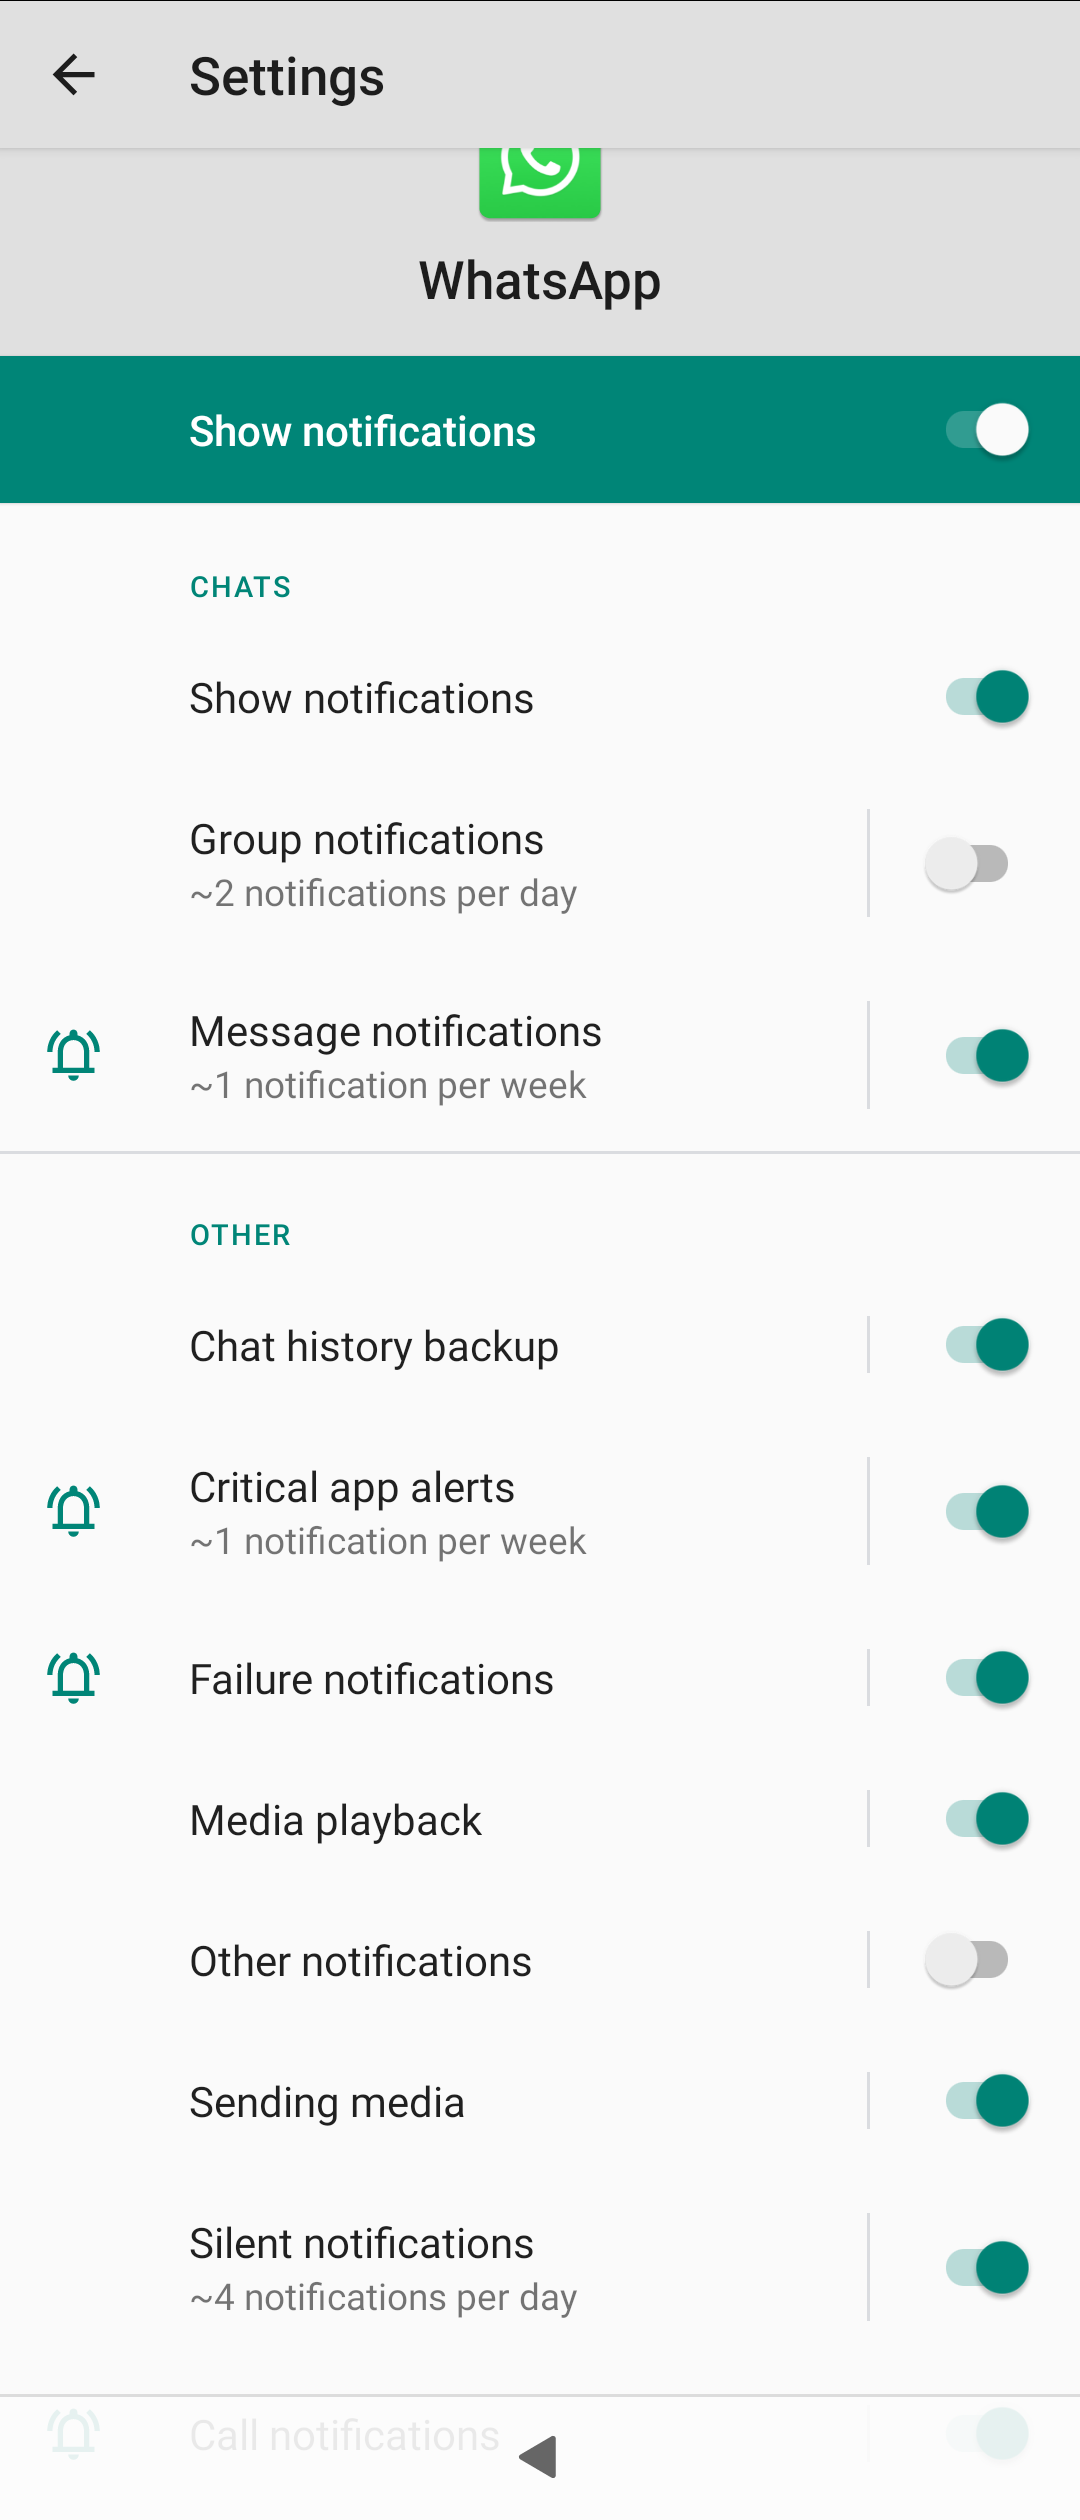
6) Selecting ringing tones and notification tones
Open Whatsapp app. Tap the three dots near the top right corner and select Settings. Next, tap Notifications. On this menu page, you can select in which ways you want Whatsapp to alert you on incoming messages, group messages and calls.
Moving your WhatsApp data to a new phone
You may want to copy your WhatsApp app with all of its messages from an old phone to a new one. The following steps should make it easier for you. On Google Android devices, this happens automatically through Google Drive, but on SailfishOS some manual steps are needed.
On the old phone
- Open WhatsApp. Select the Chat page.
- Tap the 3 dots at the upper right corner and select Settings
- Tap Chats
- Tap Chat backup and let the app make a backup of your messages to your phone. This might take several minutes.
- Close WhatsApp app
Connect your phone to your computer in MTP mode. On your computer, use the file manager to access your Sailfish phone.
- Find folder “Mass storage > android_storage > Android > media > com.whatsapp > Whatsapp”
- Copy the Whatsapp folder over to your computer, to Downloads, for instance.
- Disconnect the phone from the computer.
On the new phone
- Install WhatsApp application.
- Open WhatsApp shortly so that it adds a folder to the phone. Select the langauge and close WhatsApp then.
- Open “Settings > Apps > WhatsApp”
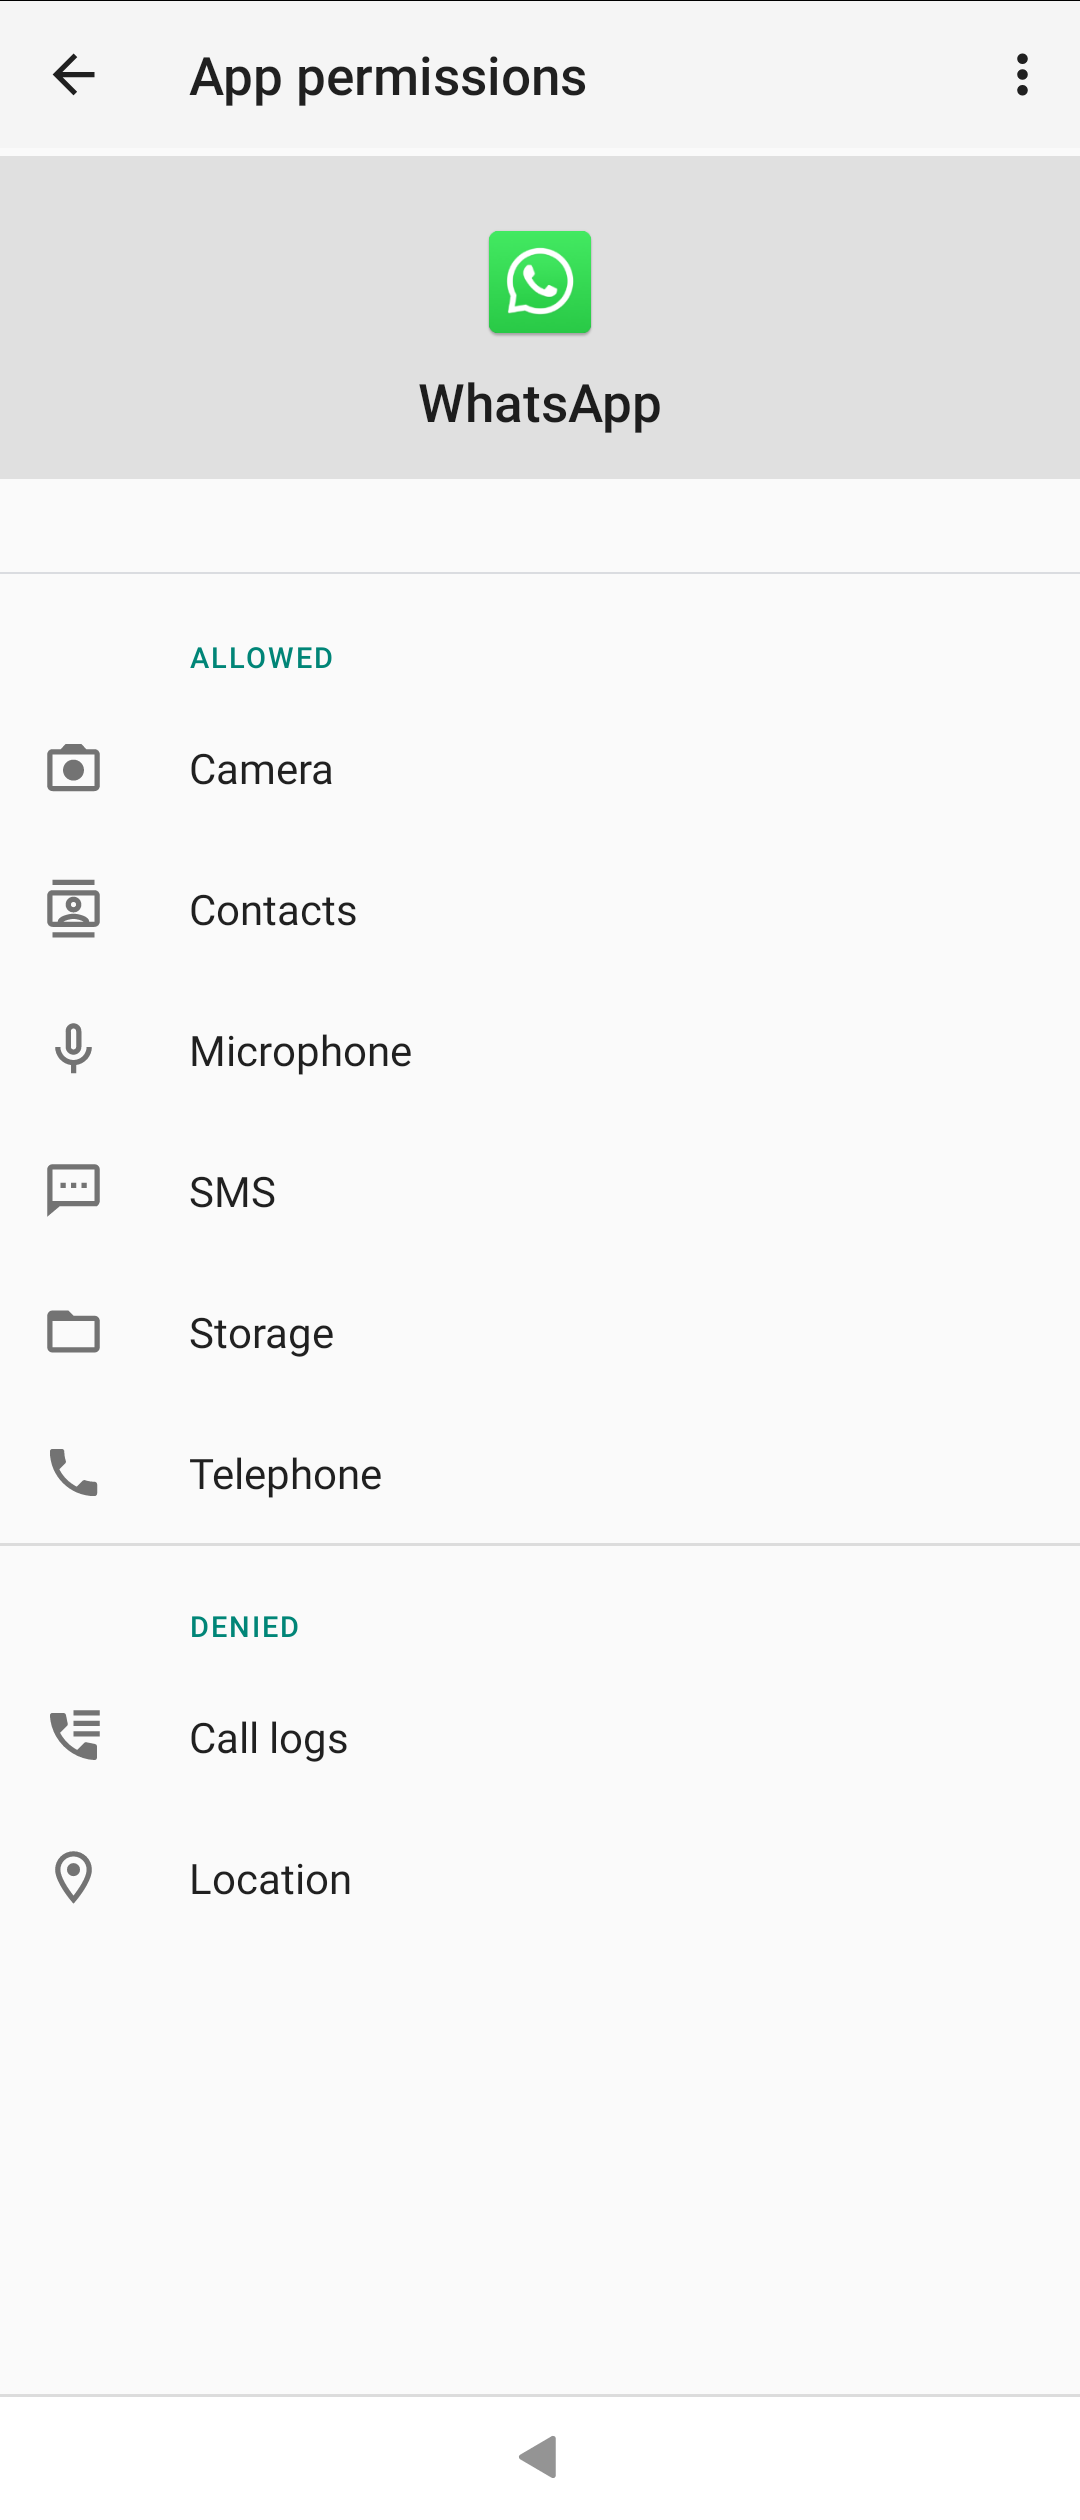
- Tap “Open Android settings”
- Tap Permissions
- Tap Files and media to allow Whatsapp to read and write your previous (and future) data on the phone.
- Tap all other items you need for using WhatsApp. For full service, you will need to give all permissions. If you do not give the permissions now the app will keep prompting for them later. See the three pictures at step 5 of this chapter above.
Connect this new phone to your computer in the MTP mode. On your computer, use the file manager to access your Sailfish phone.
- Using the file manager find folder “Mass storage > android_storage > Android > media > com.whatsapp” on your phone. Open it and delete the folder Whatsapp in it (if exists)
- Paste here the Whatsapp folder that you copied from your computer. It should appear in “Mass storage > android_storage > Android > media > com.whatsapp”. This might take several minutes.
- Disconnect the phone from the computer.
On the phone
- Open Whatsapp
- Type your phone number
- Enter the verification code received from WhatsApp
- Type the code of the potential 2-factor authentication
- Restoring of the Backup is offered, allow WhatsApp to restore the backup.
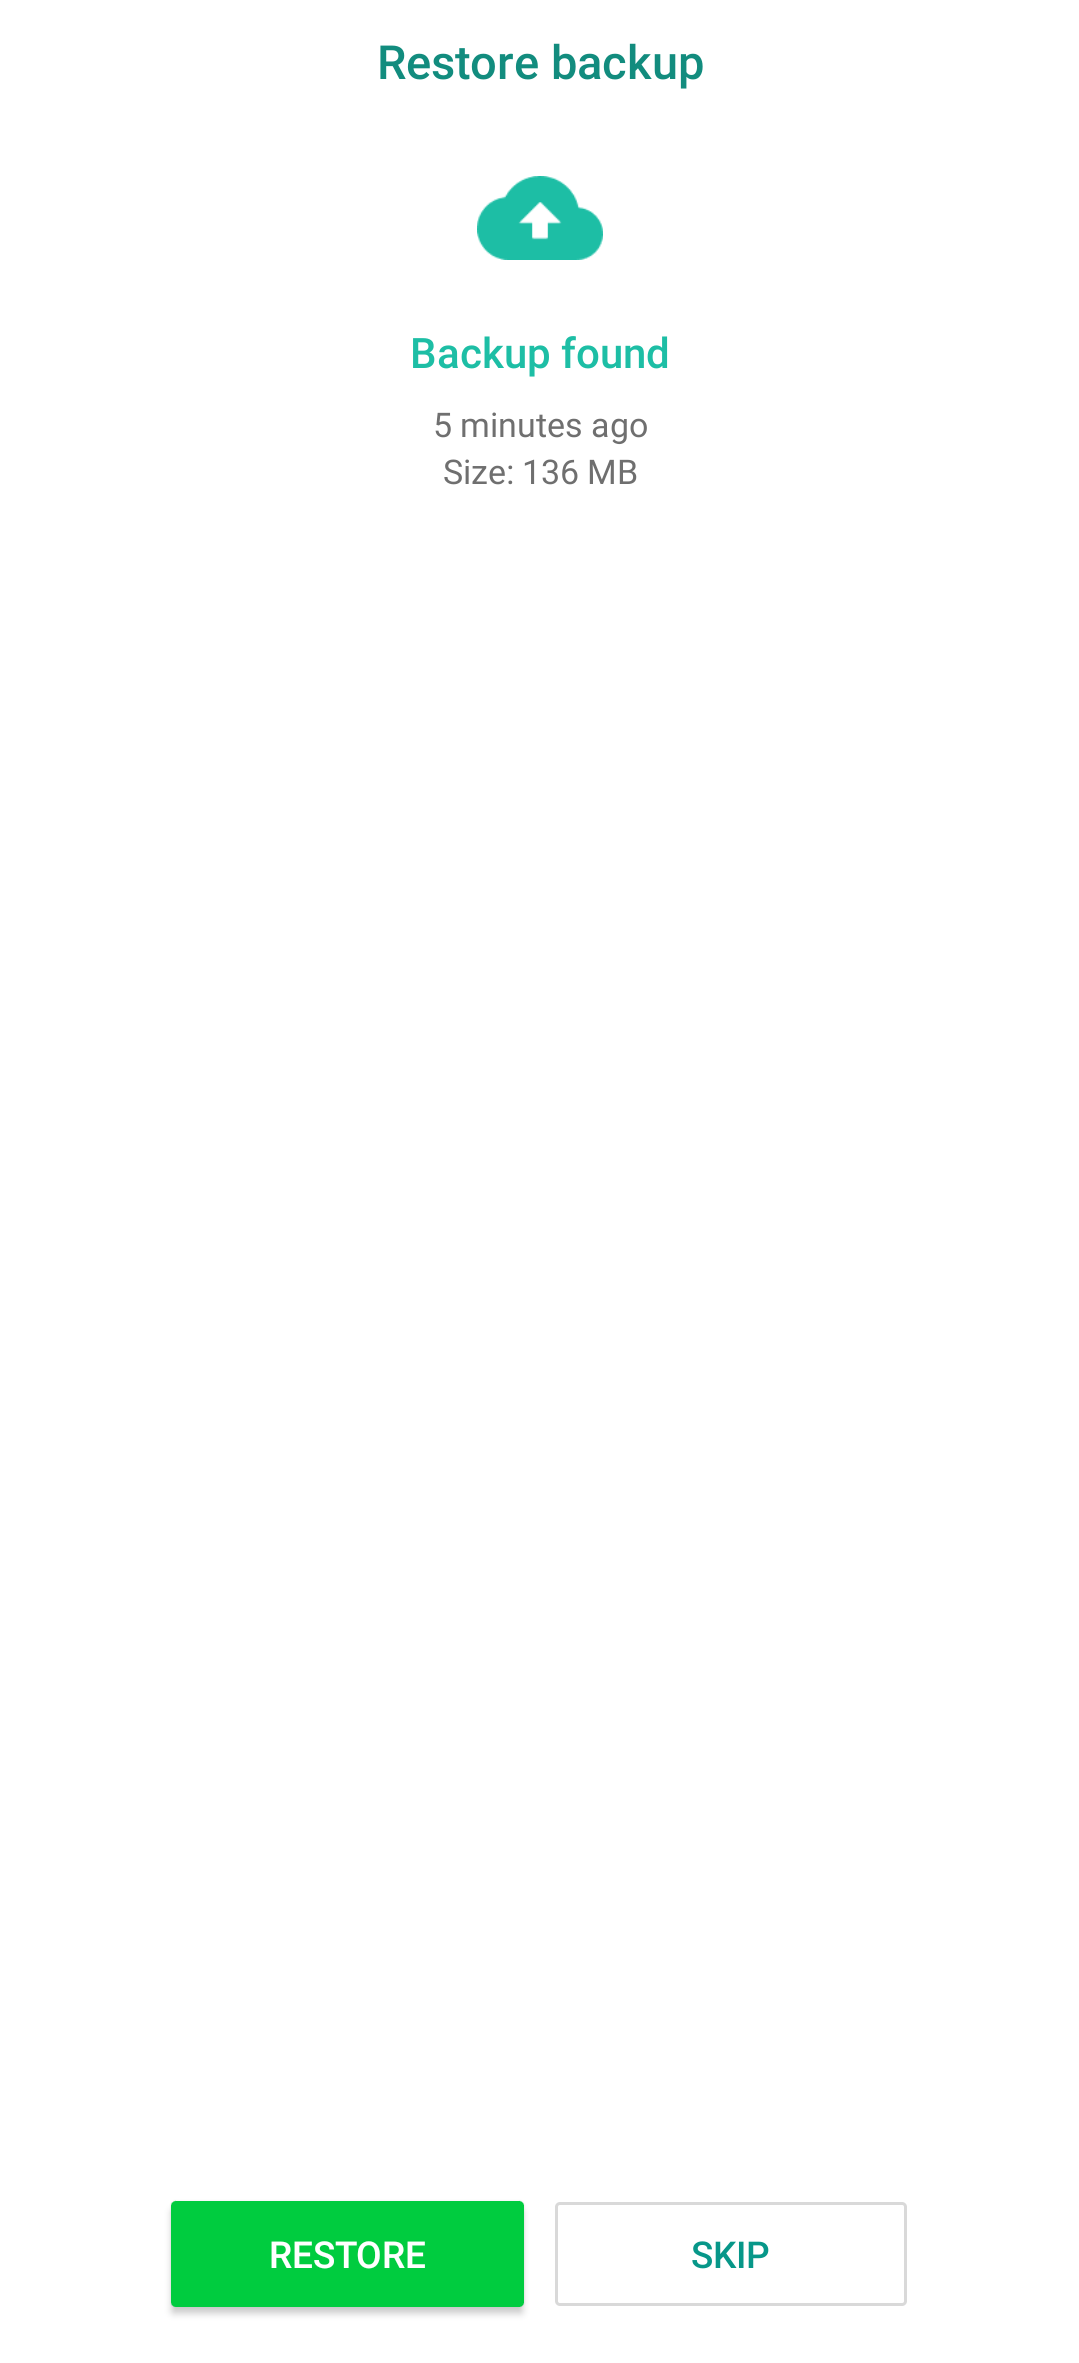
After these steps your WhatsApp should have your backup restored and everything ok.
If you have problems to save content from WhatsApp to the device following steps should help.
- Enable the Developer mode on the phone
- Give the following commands on the Terminal app:
devel-su

ls -l /home/.android/data/data | grep com.android.providers.media.module
This command prints a line like that below:
drwx------ 7 510036 510036 4096 Mar 21 13:54 com.android.providers.media.module
On that line, the number 510036 is your UID, so replace that number with your own. We will need it in the next command. Use the numeric code in the command below.
chown -R 510036:appsupport-media_rw android_storage/Android/media/com.whatsapp/WhatsApp
After this you are done and you can close the terminal connection.
Troubleshooting
Q: I can’t get all my contacts to show in WhatsApp. Some show names, but some just show the phone number
On Sailfish 4 and on the latest releases of Sailfish 3, the contacts saved in the People app should automatically appear in WhatsApp, given that you have given the permission for this in the settings of WhatsApp.
A1: If you have an Xperia XA2 or Xperia 10, then follow step #5 in this chapter to give the required permissions. Should this not help, carry on reading the instructions just below the next two pictures.
A2: If you have an Xperia X, Jolla C, Jolla Tablet or Jolla Phone, then this is for you. First, please make sure that you have given Android applications permission to access your contacts in Settings > Android AppSupport - the pictures below represent the Sailfish settings for Android AppSupport on Jolla1, JollaC and Xperia X devices:

 Screen captures from setting up the whatsapp
If activating this setting does not solve the issue, please read on.
Below is a list of everything you can try to jostle up WhatsApp to find all your contacts. You don’t have to try all of them, but we recommend you start from the first suggestion that is least intrusive and easy, and continue down the list only if the issue isn’t solved for you.
- Go to WhatsApp “Settings” > “Contacts” (i.e. touch the 3 dots at top right corner; then touch Contacts). Activate “Show all contacts” option.
- Return to the home view of the app.
- Tap on the green “New Chat” button at the lower right corner of WhatsApp main view. Select the three dots (top-right) and select “Refresh”. This is great for updating your WhatsApp contacts with changes made to their e.g. phone numbers in the People app.
- Restart (stop and start) Android AppSupport from the Android AppSupport page in Settings (see screenshots above).
- Restart WhatsApp
- Restart your device.
- Try the troubleshooting steps provided by WhatsApp in the WhatsApp application. You can find them as follows:
1) Press the New Chat button:
2) In the next view, press the three dots top-right and select Help:

3) Please try out the steps suggested in the next view.
If your problems continue even after these steps, we can only suggest you check in the People app that contact information for these certain contacts are in order (e.g. no multiple numbers, incorrect numbers).
Q: I can’t send pictures or videos. Whatsapp reports “this picture does not exist in the phone memory”
Did you forget to run the commands at the end of this chapter? That should help.