
SSH and SCP (Linux)
Contents
Using the Sailfish command line on the Terminal app is ok for small tasks. However, if there is a need to type plenty of long commands, copy-pasting them perhaps, and to easily view the results, then we recommend that you connect to your Sailfish device from a computer with SSH.
Prerequisite
You must unlock the device lock and the encryption of your Sailfish phone before you can make an SSH connection to the phone. In other words, the phone must be on and unlocked. See these articles: device lock and encryption.
We refer to Ubuntu Linux in this document. However, the same instructions should work with other Linux distributions.
Preparing the connection
Make sure you have the Developer mode enabled on your Sailfish device. If not, see this article. Check that you have the SSH password set in “Settings > Developer tools > Remote connection”.
USB
Connect a USB cable between your PC and your Sailfish device. Choose “Developer mode” on the device display at the moment of connection.
On Sailfish, the address of the USB connection is the fixed 192.168.2.15. It appears in the examples of this document.
WLAN
Ensure that your PC and Sailfish device are connected to the same WLAN network (SSID). Check the WLAN IP address of your device in “Settings > System > Developer mode”.
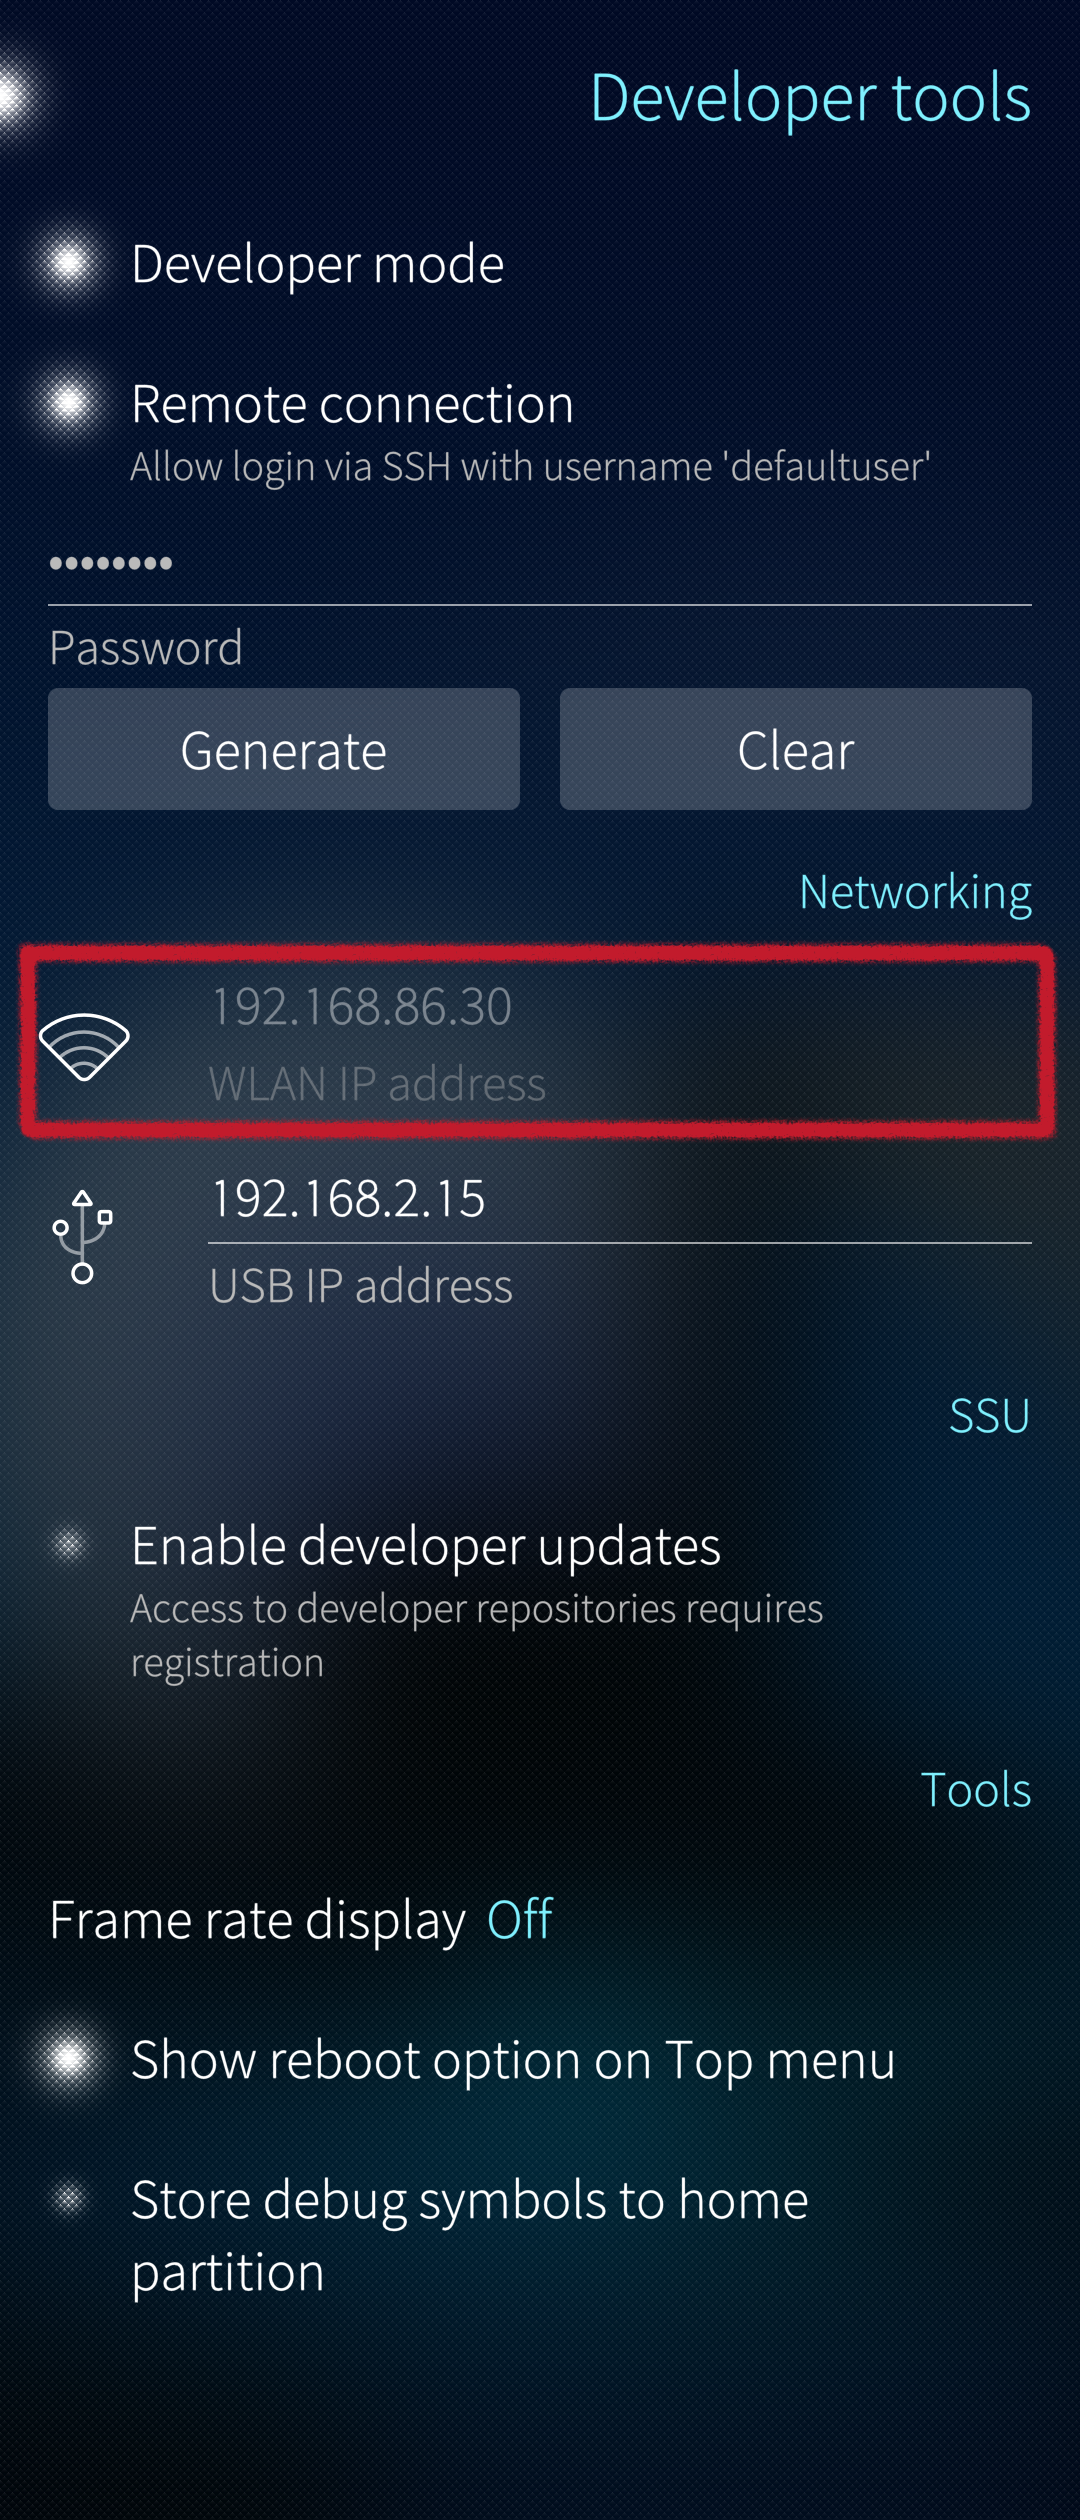 WLAN IP address of Sailfish phone
SSH session
Open the Terminal on Ubuntu. Note that there are two different usernames depending on the Sailfish OS version on your phone: ‘defaultuser’ and ‘nemo’. Only the correct one works. You can check it from the prompt of the Terminal app of the phone or with the command below (before getting root rights).
echo $USER
The reply should be either nemo or defaultuser. If you should get root then do exit first and try again.
Create the SSH connection with the correct command (matching your username). In the examples of this document, we will use the more common name ‘defaultuser’.
USB example
ThinkPad-T480s / $ ssh defaultuser@192.168.2.15
defaultuser@192.168.2.15's password:
Last login: Thu Nov 24 16:26:35 2022 from 192.168.86.42
,---
| Sailfish OS 4.4.0.72 (Vanha Rauma)
'---
[defaultuser@Xperia10II-DualSIM ~\]$ ls -l
total 240
drwxrwxr-x 2 defaultu defaultu 4096 Sep 29 09:05 Desktop
drwxrwxr-x 2 defaultu defaultu 4096 Nov 24 15:44 Documents
drwxrwxr-x 3 defaultu defaultu 4096 Nov 24 15:59 Downloads
WLAN example
ThinkPad-T480s / $ ssh defaultuser@192.168.86.30
defaultuser@192.168.86.30's password:
Last login: Thu Nov 24 16:26:07 2022 from 192.168.86.42
,---
| Sailfish OS 4.4.0.72 (Vanha Rauma)
'---
[defaultuser@Xperia10II-DualSIM ~\]$ ls -l
total 240
drwxrwxr-x 2 defaultu defaultu 4096 Sep 29 09:05 Desktop
drwxrwxr-x 2 defaultu defaultu 4096 Nov 24 15:44 Documents
drwxrwxr-x 3 defaultu defaultu 4096 Nov 24 15:59 Downloads
SCP session
The SCP connection allows you to transfer files between your phone and your Ubuntu computer.
Prepare in the same way as in the chapter “Preparing the connection” above. Then use various commands to copy files between the two devices. There are some examples below.
Over USB
Examples:
1) Copy the file “User-manual.txt” from Ubuntu (from the current directory) to the home directory on your phone:
scp User-manual.txt defaultuser@192.168.2.15:/home/defaultuser/
2) Copy the directory “Scripts” from Ubuntu to the directory “test” on your phone. Note the attribute “-r” which makes it copy the entire directory tree:
scp -r Scripts/ defaultuser@192.168.2.15:/home/defaultuser/test/
3) Copy the file “journal.log” from your phone to Ubuntu (to the current directory):
scp defaultuser@192.168.2.15:/home/defaultuser/journal.log ./
4) Copy all “.log” files from the phone directory /var/log to the Ubuntu directory /testdir/logs:
scp defaultuser@192.168.2.15:/var/log/*.log /testdir/logs/
Over WLAN
Replace the USB address 192.168.2.15 with the current WLAN IP address of your Sailfish device in the examples above.
Troubleshooting
If the connection attempt fails, disconnect the phone from the PC. Restart the phone (consider restarting the PC, too). Try again.