
Tips and Tricks
Contents
- Basic concepts of the Sailfish user interface
- How to close apps
- How to keep your Sailfish device in good shape
- Forced power off
- Total device reset
- Taking screenshots (screen captures)
- Quick calls from the call history
- Sailfish Utilities
- Clearing the media database
- Adding a folder to the scope of media indexing
- Checking Open Source Licenses
- Clearing notifications from Events view
Basic concepts of the Sailfish user interface
Here one can get familiar with the basic concepts of Sailfish OS. They were upgraded for Sailfish 3 the previous time. Learn how to use a Sailfish OS device promptly and conveniently.
- UX Framework The main vies of Sailfish OS explained: Lock screen, Home, Events, Top Menu, and App Grid
- Gestures This presentation shows the different swipes and taps that make it convenient to use Sailfish OS
- Navigation Architecture How to move in apps and how to use dialogues and the pulley menu
- App Icons Brief presentation of icons. Instructions for creating icons of your own
How to close apps
This article briefly describes how to close apps on the Sailfish OS. The same gestures work both for Sailfish and Android apps.
Closing an app or several apps in the Home view
All of your open apps appear as rectangles (minimized to thumbnails) in the Home view. It is easy to switch from one app to another there, or close apps.
If you have one app fully open, i.e., covering the entire display, you can enter the Home view by swiping leftwards from beyond the right edge of the device. This gesture will minimize the current app to a thumbnail, too. The Home view has all of the currently open apps as thumbnails.
It is easy to close apps in the Home view. Long-tap any point of the display for a couple of seconds. The thumbnails will get small white circles with a cross on them (see below). Close one or more apps by tapping those circles. If you want to close all of your apps, pull down the command “Close all” and lift up the fingertip from the display (if nothing happens, tap “Close all”).
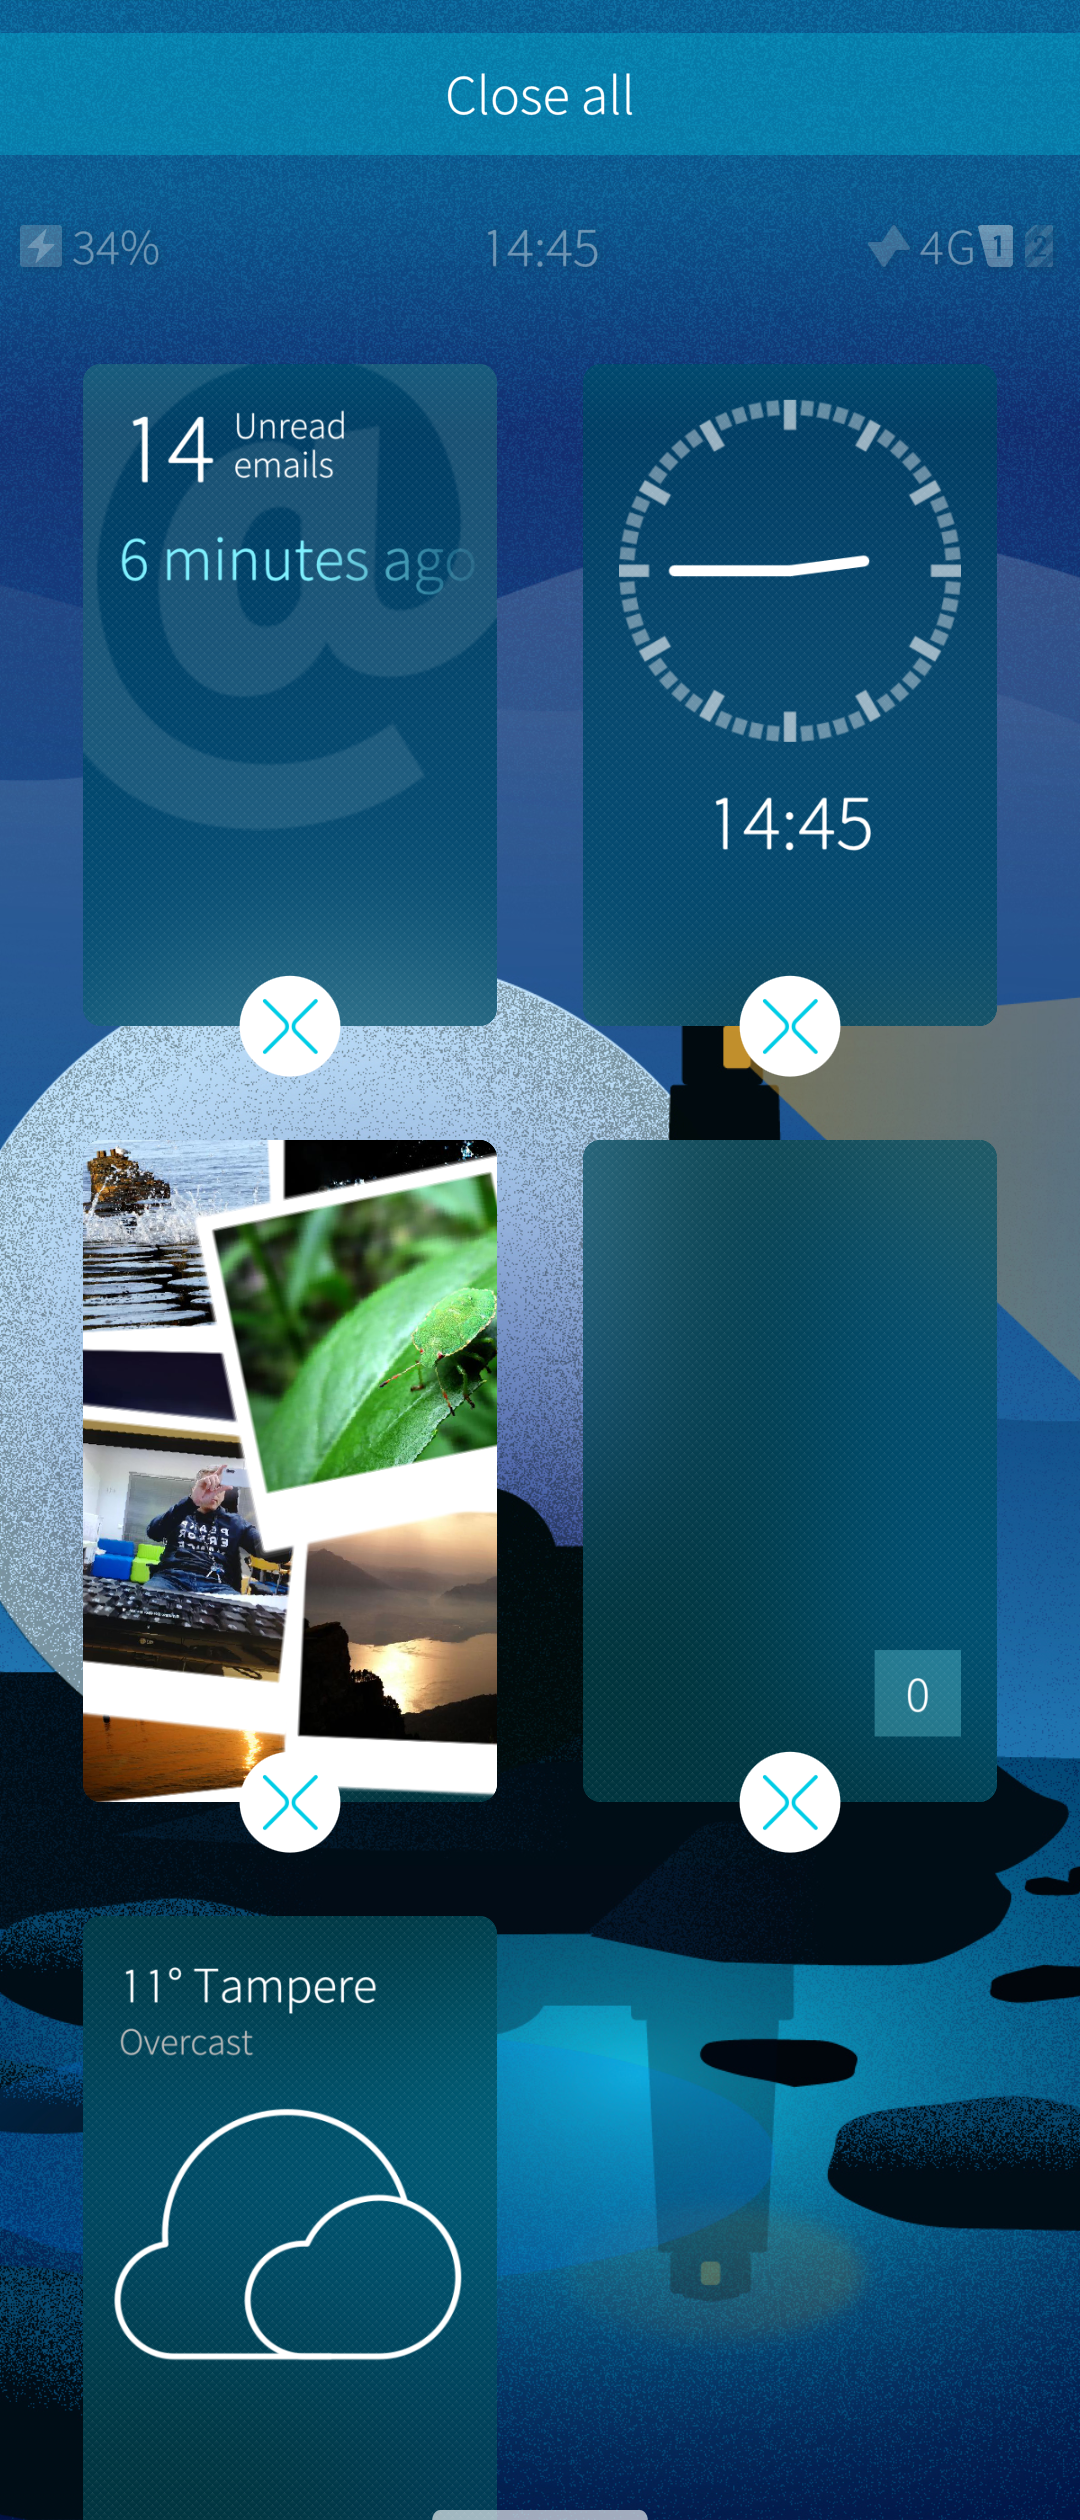 Home view with close buttons
Closing the current app by swiping
How to close apps An app can be closed with the gestures [1] shown in the picture below. Always start the swipe from one of the top corners of the display. The same gestures also work when the device is in the landscape position. Note that swiping down from the middle of the top edge would make the Top Menu appear.
There is no dedicated setting for this gesture in the Settings menu, i.e., it is always enabled.
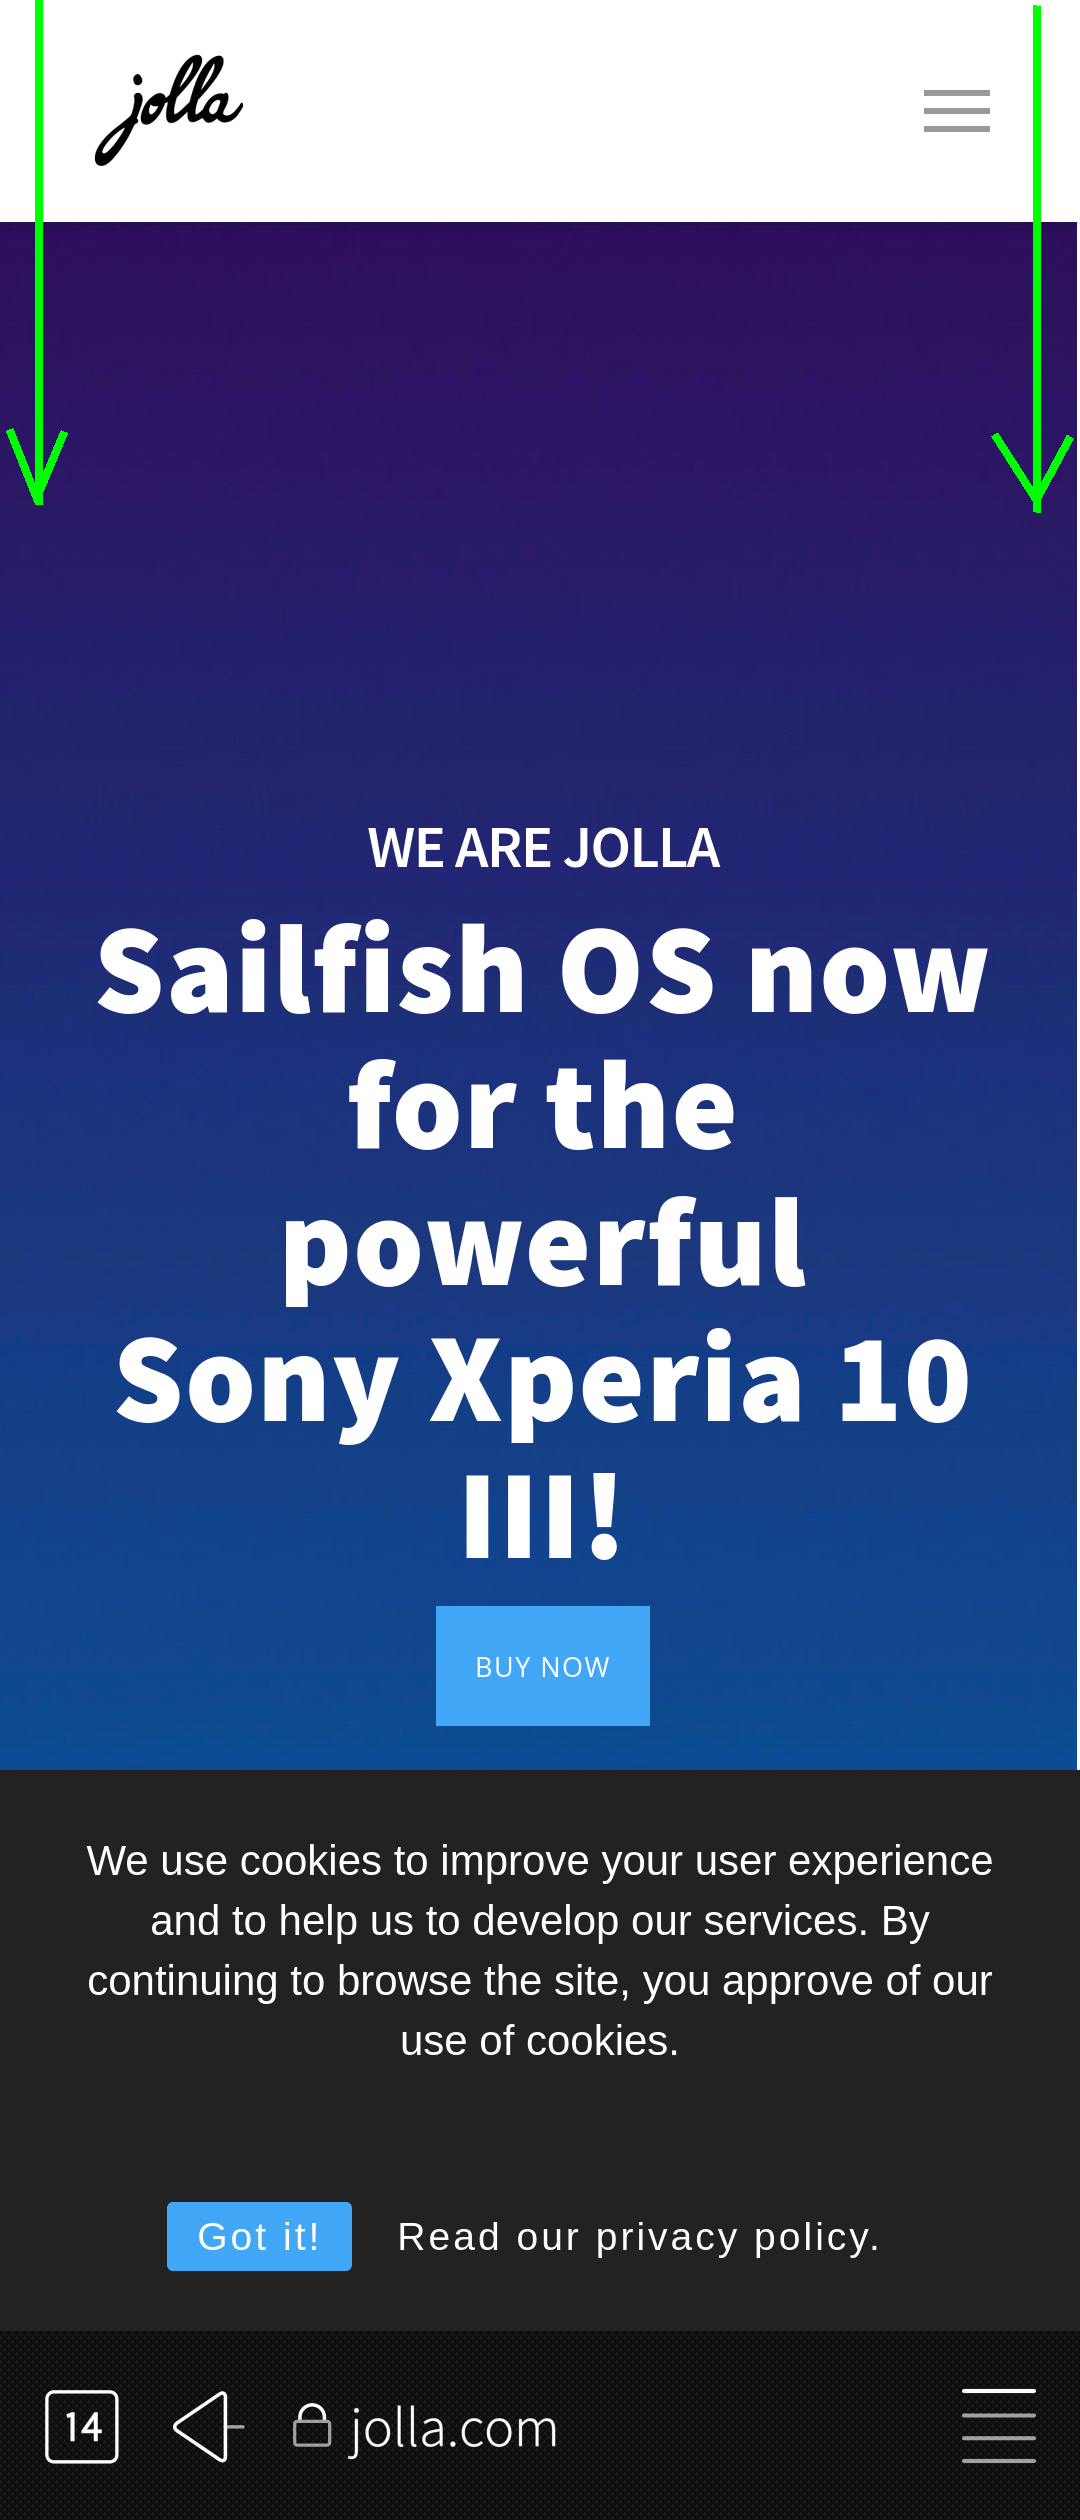 Closing an app by swiping
[1] Sailfish gestures are explained here: https://sailfishos.org/design/gestures/
How to keep your Sailfish device in good shape
Sailfish OS devices just like any other electrical devices require maintenance to keep them in shape. We have written some guidelines for this.
Update the Sailfish OS operating system to its latest version. New versions bring new features to your Sailfish device and fix problems observed on earlier versions. The latest available version is the best. This article tells how to update the OS. The device attempts to optimize the storage space before downloading an update; however, this may not work if there is no more space left for the optimization! Please follow the guidelines in step 5 below.
Update the applications you have installed. Jolla Store will send reminders to your device - they appear on the Events View. Update your Android apps in the respective application stores (e.g. Aptoide).
Uninstall apps that you do not really use.
Restart the device every now and then (for instance, once a week). Some unnecessary data may pile up in the main memory (RAM) over time. A reboot removes it.
Install the Sailfish Utilities toolbox (later in this same document)
Check the status of the non-volatile storage (disk space)
- Open page Settings > Storage. By touching the graphical diagrams, you will get a view of the status of the storage space in your device.
- Move your valuable files (pictures, videos, documents, music) to your computer (see these instructions) or to your SD card (generic instructions on using SD cards); then delete those files from the device (Phone Memory).
- Set Sailfish Camera to save the new pictures and videos directly to the SD card at Settings > Apps > Camera.
- Pay attention to the amount of data collected by your Android apps in the folder
$HOME/android_storage/in the Device Memory. Especially various map apps, games and apps like Spotify and Whatsapp may collect a lot of data in the long run. - Delete your downloaded email attachments (if you do not need them) kept in
$HOME/Downloads/mail_attachments/. This is easiest to do with File Browser application.
Please find more complete instructions in the article “Storage space”.
Close the apps you do not need continuously. Although SailfishOS is a multitasking operating system it may not always be possible to handle a large number of apps at the same time in the available memory (RAM).
Remember to make a backup of your data on a regular basis either to the SD card or to a cloud service. If your device should malfunction badly it may need to be reset to the factory settings in which case all data in the device memory would be lost. The backup will remain intact in the memory card and in the cloud service. Instructions on backups are in this article.
If the charge level of the battery goes down faster than expected then read this article and consider the proposed different ways of saving energy.
Forced power off
Your phone might end up in a situation where it is stuck in such a way that turning it off in the usual way with the Power key is not possible.
The device manufacturer has created the following backup method for forcing the phone to the off state:
- Press both the Power and the Volume Up keys down at the same time and keep them pressed.
- The display goes black soon. After about 10 seconds, the phone plays the vibrator once (1). - if you release the keys now the phone restarts itself automatically - if you want to turn the phone off keep pressing the two keys
- In the next 5-10 seconds (i.e. in 15-20 seconds from the beginning), the phone plays the vibrator three (3) times. Release the keys now. The phone is off.
Use the Power key to turn the phone on, again.
Total device reset
There are the following ways to “clean up” a Sailfish phone. All user data, accounts and installed apps are deleted.
- Device reset (a.k.a. factory reset) - see this article. This requires that the menus of the phone are still avalable.
- Reinstallation (“flashing”) of Sailfish to Xperia phones - see this article
- Recovery mode - see the instructions for Xperia phones, Jolla Phone, Jolla C and Jolla Tablet
We compare options 1 and 2 in the table below.
| PRO | CON | |
| Device reset | * can be done with the phone only, no extra devices are needed * simple to do via the phone UI as the command line (Linux commands) is not needed NB: not available on all Sailfish phones | * reverts the phone OS to an old version (which must be updated) * after the reset, the OS update chain must traverse all Stop Releases - there may be plenty of them - lots of work and may take several hours * the old OS version remains on the phone (so, another reset later would require lots of work) * there are some known issues with the OS update chain - you would risk hitting them |
| Reinstallation | * you will get the latest OS version right away * you would avoid the potential issues with the OS update chain as there is no need to update * if the phone should be reset in the future, the reset would revert the OS to this fairly recent version only (as the recovery version is updated in this process) * it takes only 10-15 minutes if the flashing environment is ready on a PC * this clean-up is more powerful than the device reset | * preparing the flashing environment on a PC may take time from an inexperienced user (although we have good instructions for you) * problems with USB ports are typical especially with some Linux flavours * installing the fastboot drivers to Windows is somewhat complicated * not possible for Jolla Phone, Jolla C nor Jolla Tablet as flashable OS images are not available |
NOTE: The common drawback with both device reset and reinstallation is that all data, apps, and accounts are deleted from the phone. A complete re-setup is needed afterward.
We recommend reinstallation.
Taking screenshots (screen captures)
Sailfish OS supports several ways of capturing pictures from the device display.
1) Press the Volume Up and Volume Down keys down at the same time, and keep them pressed for a second or two until you hear the camera shutter tone and/or see a notification banner appear at the top of the screen with the text “Screenshot captured”.
The pictures are saved to the folder “Pictures > Screenshots”. They can be viewed in the category Screenshots of the Gallery app.
2) Some external application sources, for instance, openrepos.net, may have alternative tools for capturing the screen contents.
3) It is also possible to trigger a screenshot at the command line. The following dbus-send command makes the camera shoot a screenshot. This works over an SSH connection, too.
The pictures are saved to the folder “Pictures > Screenshots” in this case, too, unless you change the path on the last line of the command. The banner “Screenshot captured” briefly appears at the top part of the phone display” but there is no sound in this case.
devel-su -p dbus-send --session --print-reply --dest=org.nemomobile.lipstick \
/org/nemomobile/lipstick/screenshot org.nemomobile.lipstick.saveScreenshot \
string:"/home/defaultuser/Pictures/Screenshots/Screenshot-$(date +%y-%m-%d-%H-%M-%S).png"
(please note that each line of the 3-line command above is separated by a space character)
Sailfish OS does not support capturing video clips.
Quick calls from the call history
Visit the menu “Settings > Apps > Phone”. Look for the setting “Quick call”.
- When ON, one can make phone calls with one tap in the call history of the Phone application. This is the default setting of Sailfish OS.
- When OFF, tapping on an item in call history brings up the contact information, allowing one to choose whether to call (and to which number if multiple numbers) or to send an SMS or an email.
Choose which way you like it better.
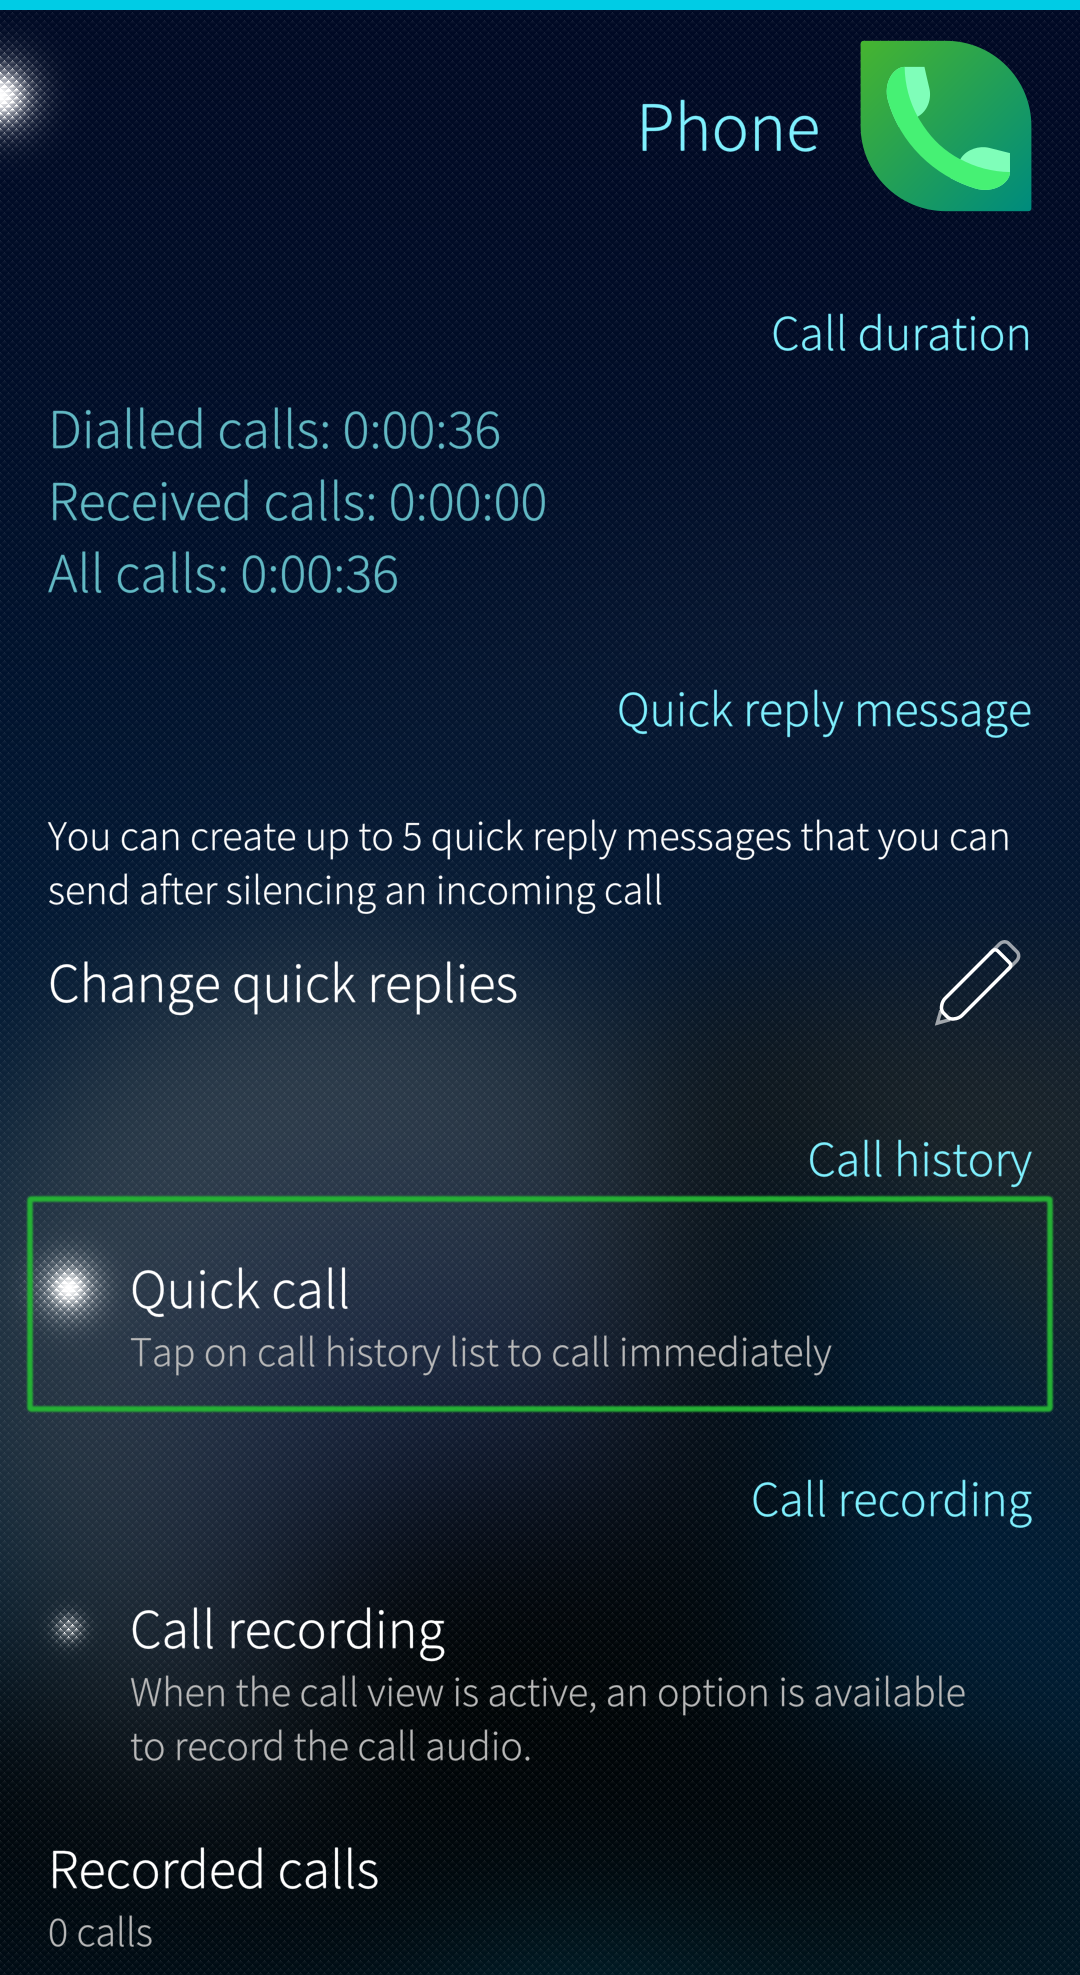 Call app settings
Sailfish Utilities
Description
Sailfish Utilities is a collection of tools for healing a Sailfish device which does not perform well. The tools are designed to help if your device feels sluggish, it’s running out of disk space or you’re experiencing problems with connectivity.
You can install Utilities from the Jolla Store. Search for Sailfish Utilities in the Store. After having been installed it appears near the end of the page “Settings > System” by the name Utilities (i.e., there is no app icon at the app grid for it).
Utilities have the following tools currently (this is the order of items on the OS release 4.6.0):
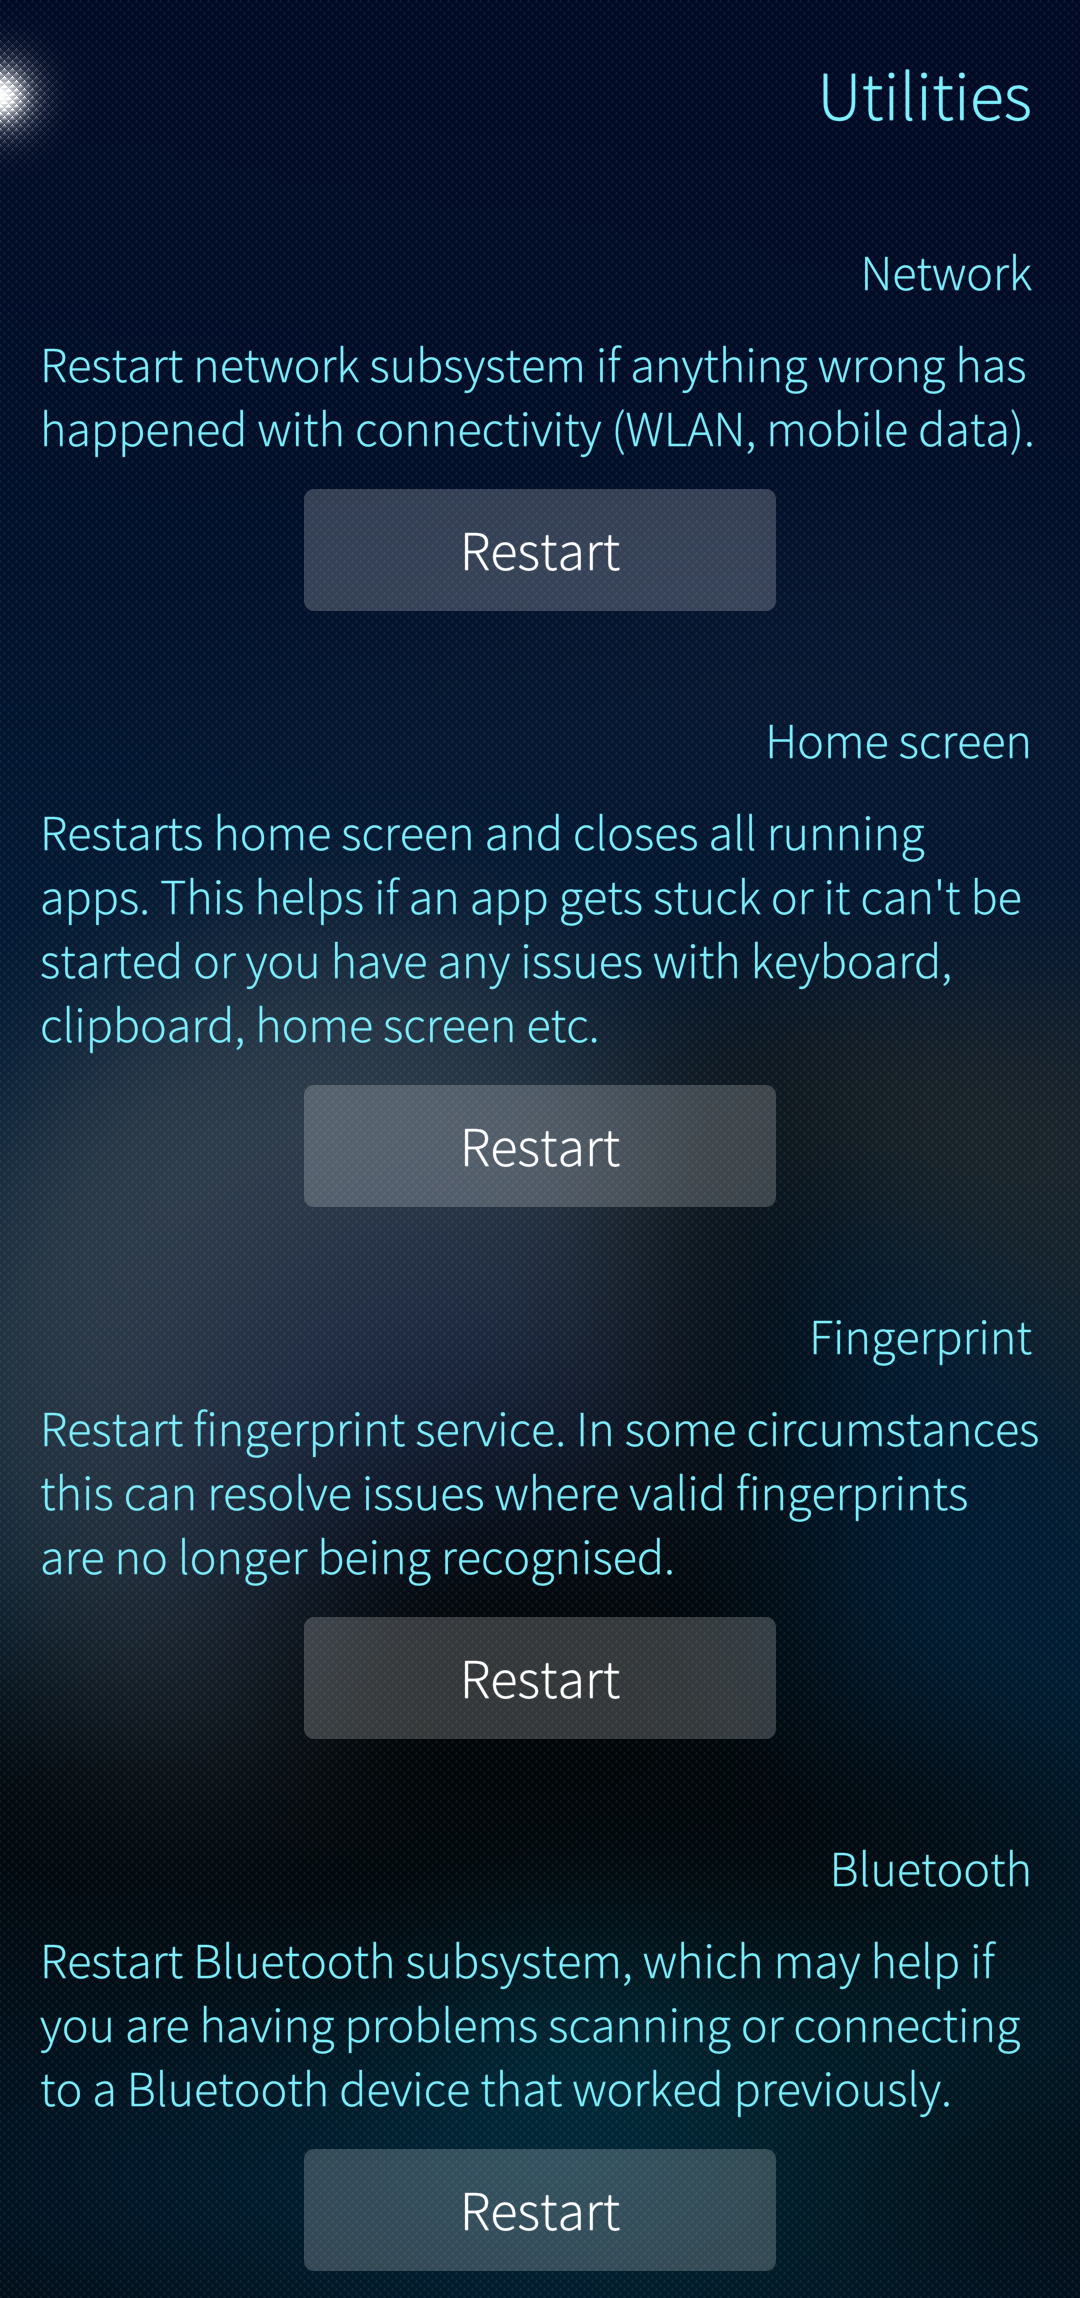 Utilities 1/2
 Utilities 2/2
Restart network connections
This tool initializes the WLAN and mobile data networks.
Issues that might get solved by running this utility:
- If you get constant notifications of connecting to either Mobile Data or WLAN, even if you are already connected to a network
- You’ve noticed an exclamation mark (“!”) on your Mobile Data and/or WLAN connection indicator in the Lock Screen
- Apps report you being offline even though you are connected to the Internet.
Restart the keyboard
This tool is used to give a new start for the keyboard if it behaves incorrectly or becomes unresponsive.
Restart the Home screen
This useful tool can be used if an application gets stuck or can’t be launched.
Restart the fingerprint service
If your valid fingerprints saved to the device are no more recognised, it may help to restart the fingerprint service.
Restart the audio service
If the phone has lost audio, i.e., no voice or music can be heard, this tool may help.
Restart the Bluetooth service
If there are problems with detecting nearby Bluetooth devices or with connecting to them it is worth trying to restart the Bluetooth service.
Fix the package cache
If there are problems with installing and managing apps from the Jolla Store then this tool is likely to help. It removes the potential collection of unnecessary code packages piled up in the device.
Issues that this utility might solve:
- If you can’t install apps from the Jolla Store and might receive a “Problem with Store - Critical problem with the app registry” message
- If your “My Apps” section in the Jolla Store is empty
- You can’t uninstall applications using the Jolla Store.
Refresh the Tracker database
This tool is to clear the Tracker database holding the media file index. Use it if not all of your music or pictures appear in the relevant apps.
Some issues that running this utility may solve:
- If you can’t see all of your music files in the Media application
- If some details are missing from your music files (album name, artist).
- If you can’t see all your images and photos in the Gallery application
- If you can’t see all of your images in Android applications.
If this utility did not bring any help consider using the command line tricks of the next chapter.
Clearing the media database
Sailfish OS has a worker called Tracker. Tracker harvests all media/document folders in a Sailfish device and in the memory card (if any), creating a registry of files found. We call this registry by the name of the media database in this article.
Sailfish media database contains the locations of music files, pictures, videos, and documents.
The Tracker starts reindexing your files right after resetting the database. After a few minutes, apps like Gallery and Media should show the updated media content.
Sailfish Utilities - the recommended way
It may happen that the database gets corrupted. Then, it is possible to refresh it by using the utility Refresh the tracker database. The device should be restarted after this. It may take a couple of minutes before Tracker has re-created the database.
Try that utility first. If it does not help then proceed to the next chapter.
Command line
If the database gets badly corrupted then it may be necessary to go to the command line (Terminal app) and reset the database there. Using the command line requires that you first enable the Developer mode. Note that those commands do not erase any media files - they only clear the registry.
a) Sailfish OS releases 4.2.0 and earlier
Type the following command to run a soft reset:
tracker reset -e
This command executes a hard reset:
tracker reset -r
Application Options: -r, –hard: Kill all Tracker processes and remove all databases -e, –soft: Same as –hard but the backup & journal are restored after restart
b) Sailfish OS releases 4.3.0 and later
On Sailfish OS release 4.3.0, we upgraded the Tracker to version 3. This changed the commands, too.
Type the following command to delete the filesystem indexer database:
tracker3 reset -s
Adding a folder to the scope of media indexing
A need may arise to add a new folder to Home for some specific content (e.g. pictures, videos, documents or music) instead of using the default folders.
We explain how to do it here. The required modifications are best done via an SSH connection to the phone. Enable the Developer mode. You will need the root rights.
Create the folder
First of all, create the folder. Replace ‘MyNewFolder’ with the name of your preference (also in the later commands).
$ mkdir $HOME/MyNewFolder
Add the folder to indexing
The new folder must be added to the list of folders the Tracker is indexing to make the content appear in apps like Gallery, Media or Documents.
The new folder is added to the scope of indexing with this command:
$ devel-su -p tracker3 index --add --recursive "$HOME/MyNewFolder"
Check that it worked. The list of indexed folders is printed with the following command. The new folder appears as the last item in the list. It is okay that the path is /home/defaultuser instead of $HOME.
$ gsettings get org.freedesktop.Tracker3.Miner.Files index-recursive-directories

['&DESKTOP', '&DOCUMENTS', '&DOWNLOAD', '&MUSIC', '&PICTURES', '&VIDEOS',
'$HOME/android_storage/DCIM', '$HOME/android_storage/Download', '$HOME/android_storage/Pictures',
'$HOME/android_storage/Podcasts', '$HOME/android_storage/Music', '/home/defaultuser/MyNewFolder']
Set the required permissions
NOTE: You may need to redo this step after a Sailfish OS update, unfortunately.
Adding the folder to the reach of the Tracker is not enough. The permissions must be arranged, too. Which permissions, exactly, depends on the data kept in the folder (pictures, videos, music, documents).
Add the line whitelist ${HOME}/MyNewFolder to one or more of the following files:
* /etc/sailjail/permissions/Pictures.permission
* /etc/sailjail/permissions/Videos.permission
* /etc/sailjail/permissions/Music.permission
* /etc/sailjail/permissions/Documents.permission
You will need to edit the file as a root. Be careful when doing it. For instance:
devel-su vi /etc/sailjail/permissions/Pictures.permission
After editing, the essential parts of Pictures.permission should be:
mkdir       ${HOME}/Pictures
noblacklist ${HOME}/Pictures
whitelist   ${HOME}/Pictures
whitelist   ${HOME}/MyNewFolder

whitelist ${HOME}/android_storage/Pictures
whitelist ${HOME}/android_storage/DCIM
Restart the phone to get everything in effect.
Checking Open Source Licenses
Easiest way to check licenses is to go to Settings > About product and scroll a bit down and click “see information about packages” which takes you to the list of packages with licenses and shows you all the open source licenses.
If you have AppSupport installed you can check open source licenses related to AppSupport at “Settings > Android AppSupport > Show licences”.
You can also use following command in terminal in case you have developer mode installed:
rpm -qa --queryformat '%{license}\t%{name}-%{version}-%{release}\n'
Clearing notifications from Events view
For various reasons, some notifications might get stuck in the Events view (see Events). With these instructions the whole notifications database can be cleared.
Preparations
Enable the Developer Mode.
Open the Terminal app on your computer and create an SSH connection to your Sailfish device
Install the sqlite utility:
devel-su
pkcon refresh
pkcon install sqlite
exit
Accessing the notifications database
Give the following commands to access the SQL database and to clear the notifications database:
devel-su -p sqlite3 ~/.local/share/system/privileged/Notifications/notifications.db
delete from notifications;
.quit
systemctl --user restart lipstick